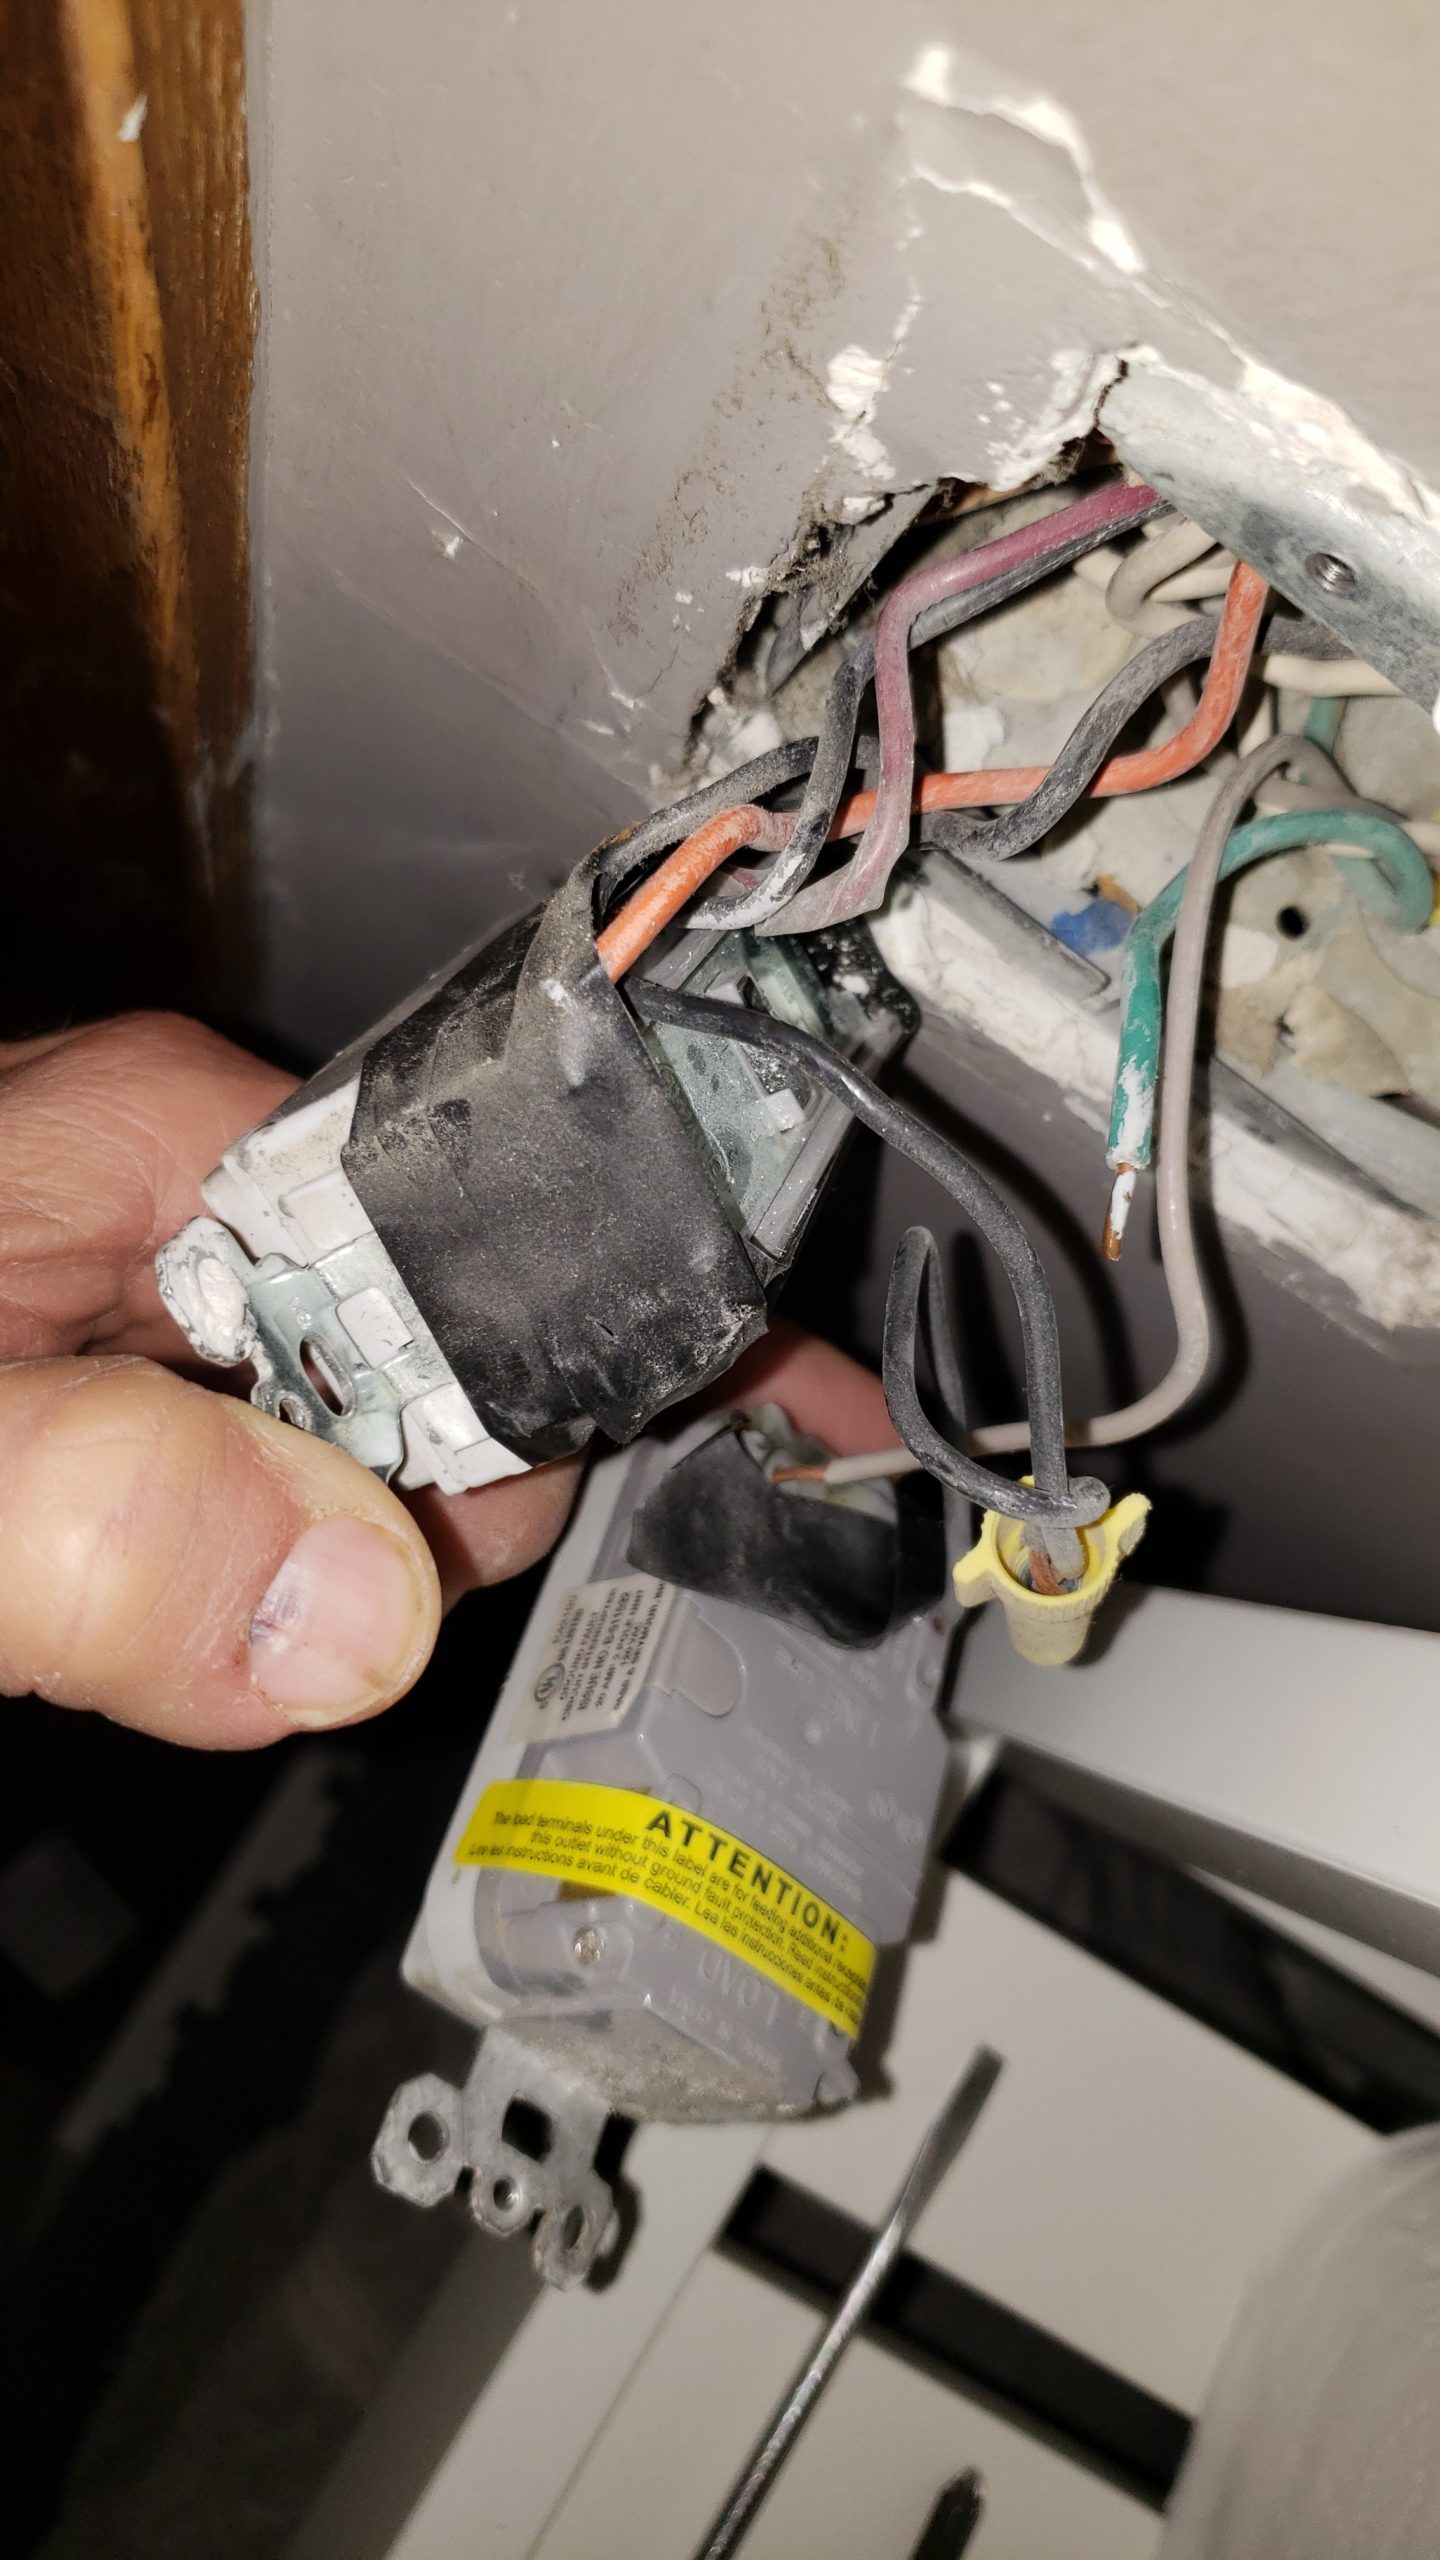
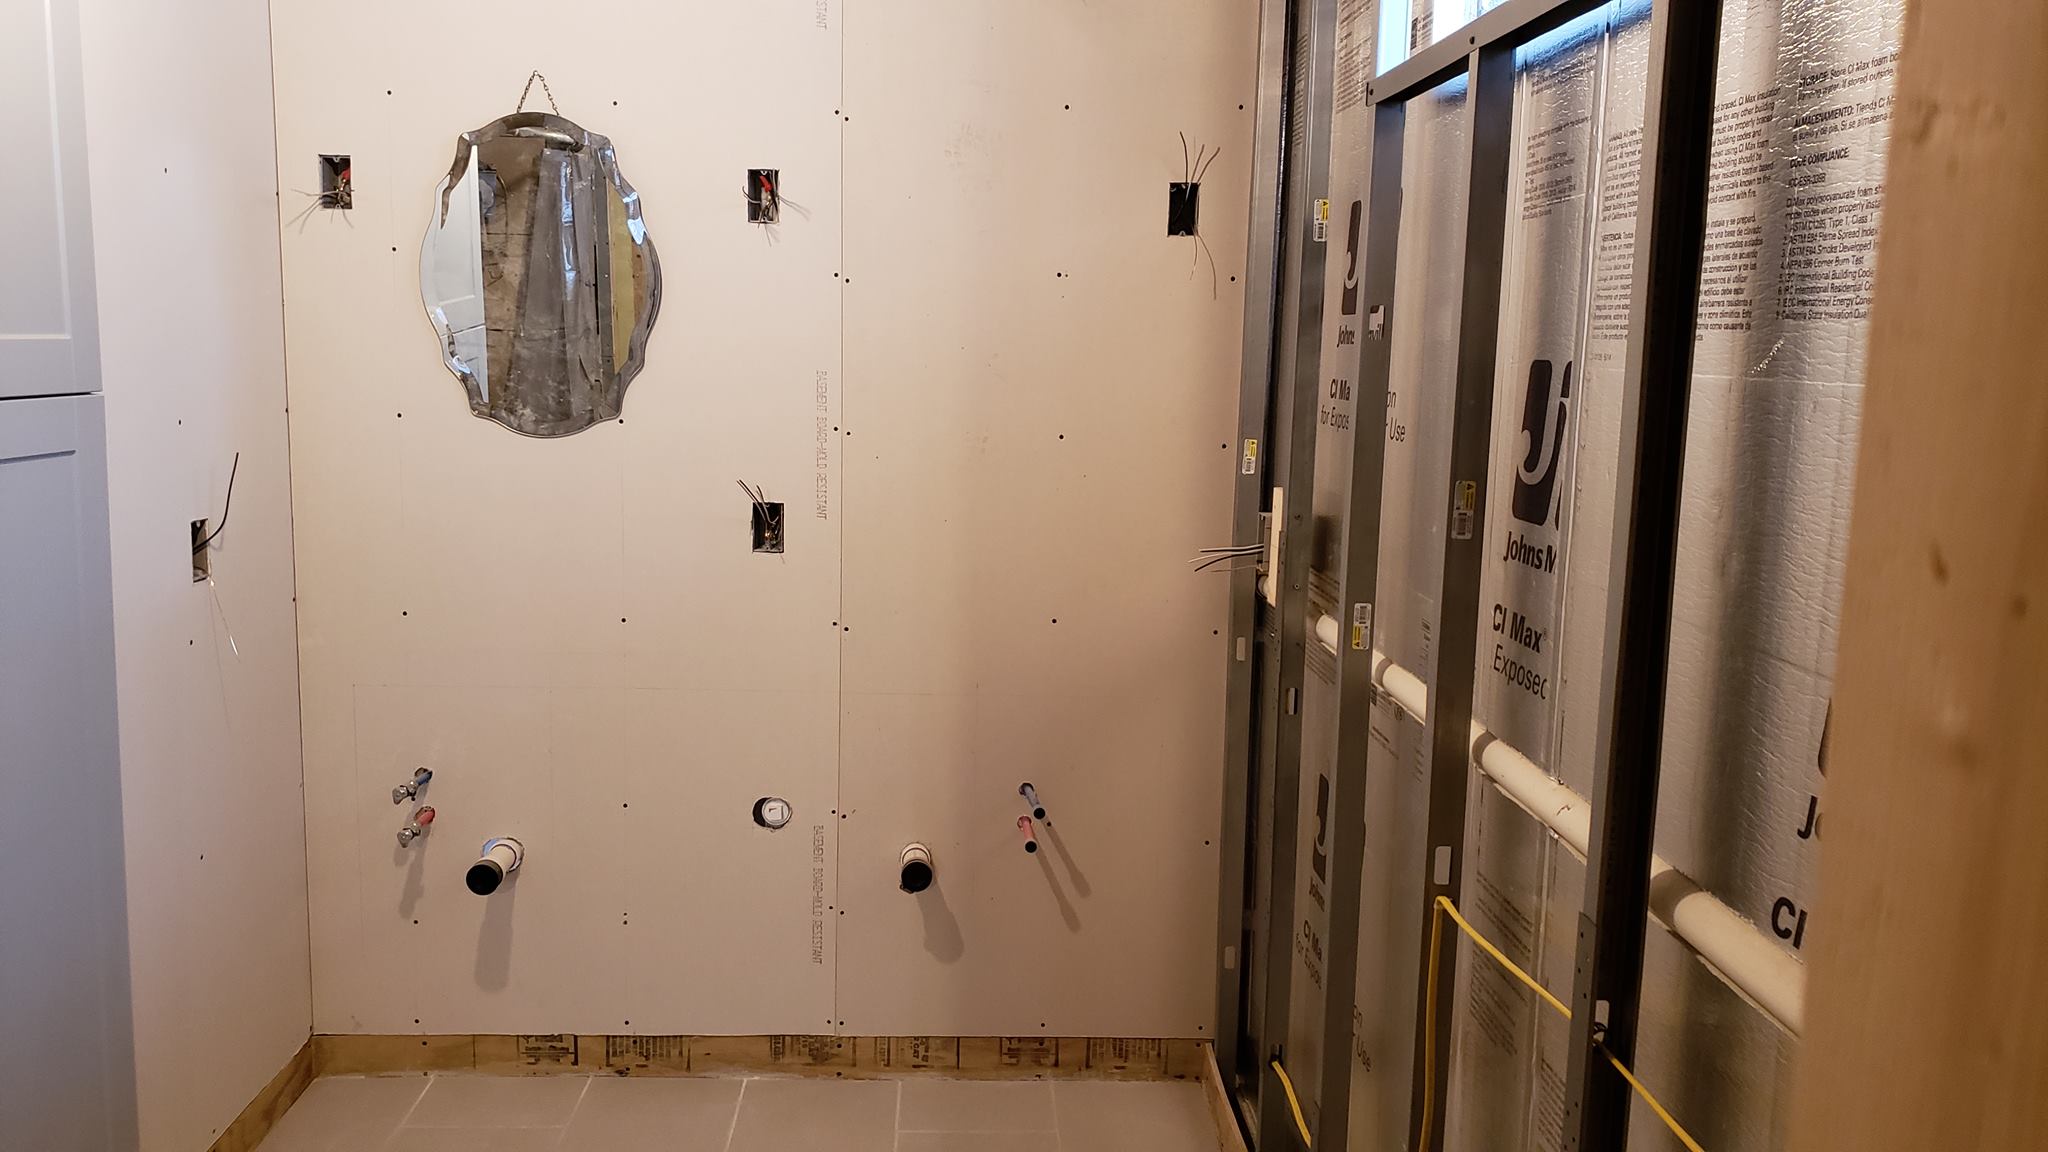
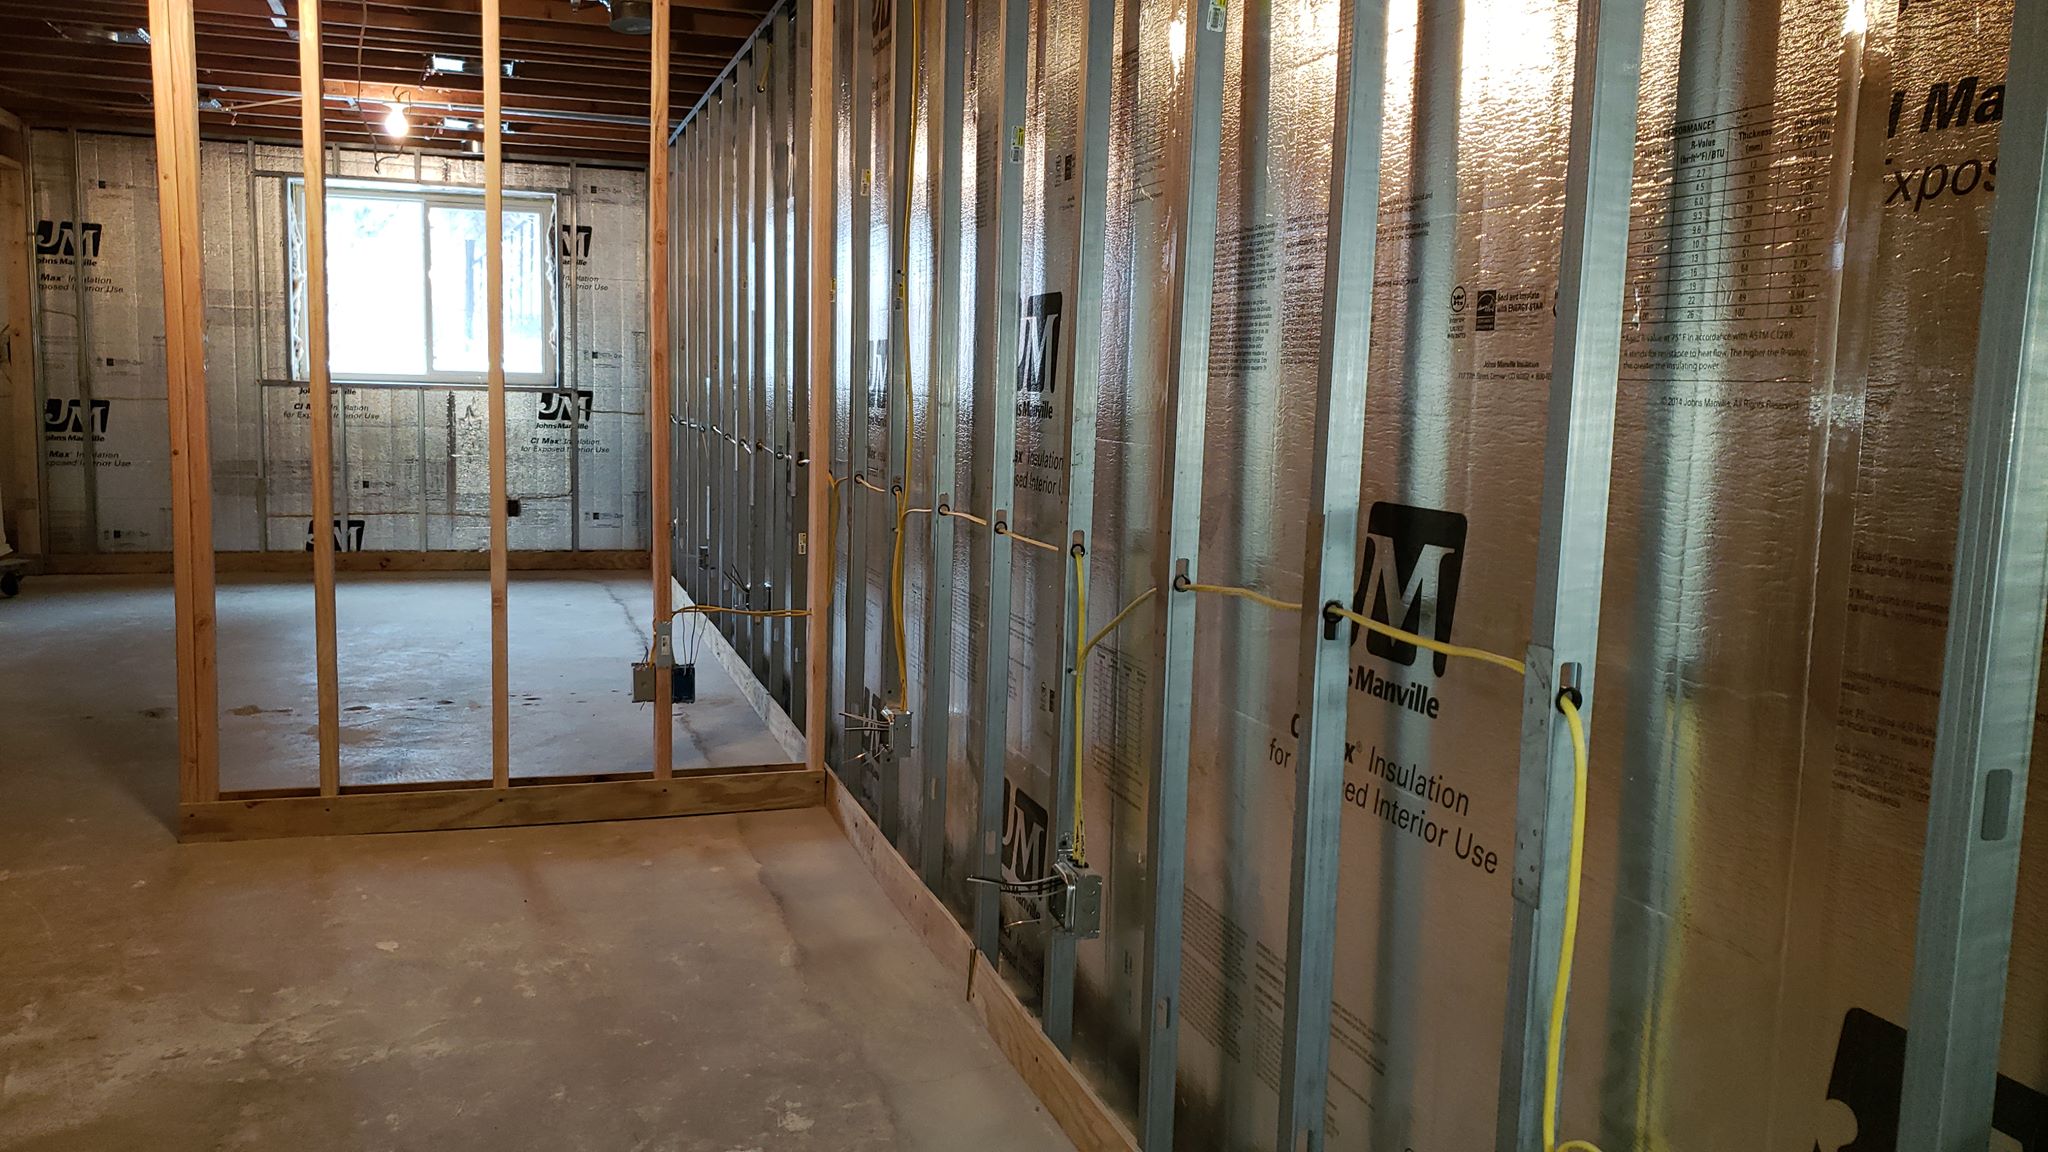
I continue opening up cover plates and testing one circuit at a time. Each one requires a unique fix. Sometimes, a single room will have outlets on different breakers. Sometimes a piecemeal wire can be replaced with a single run. I work on every level of the house: the main floor, the attic, and the basement. It’s exhausting work.
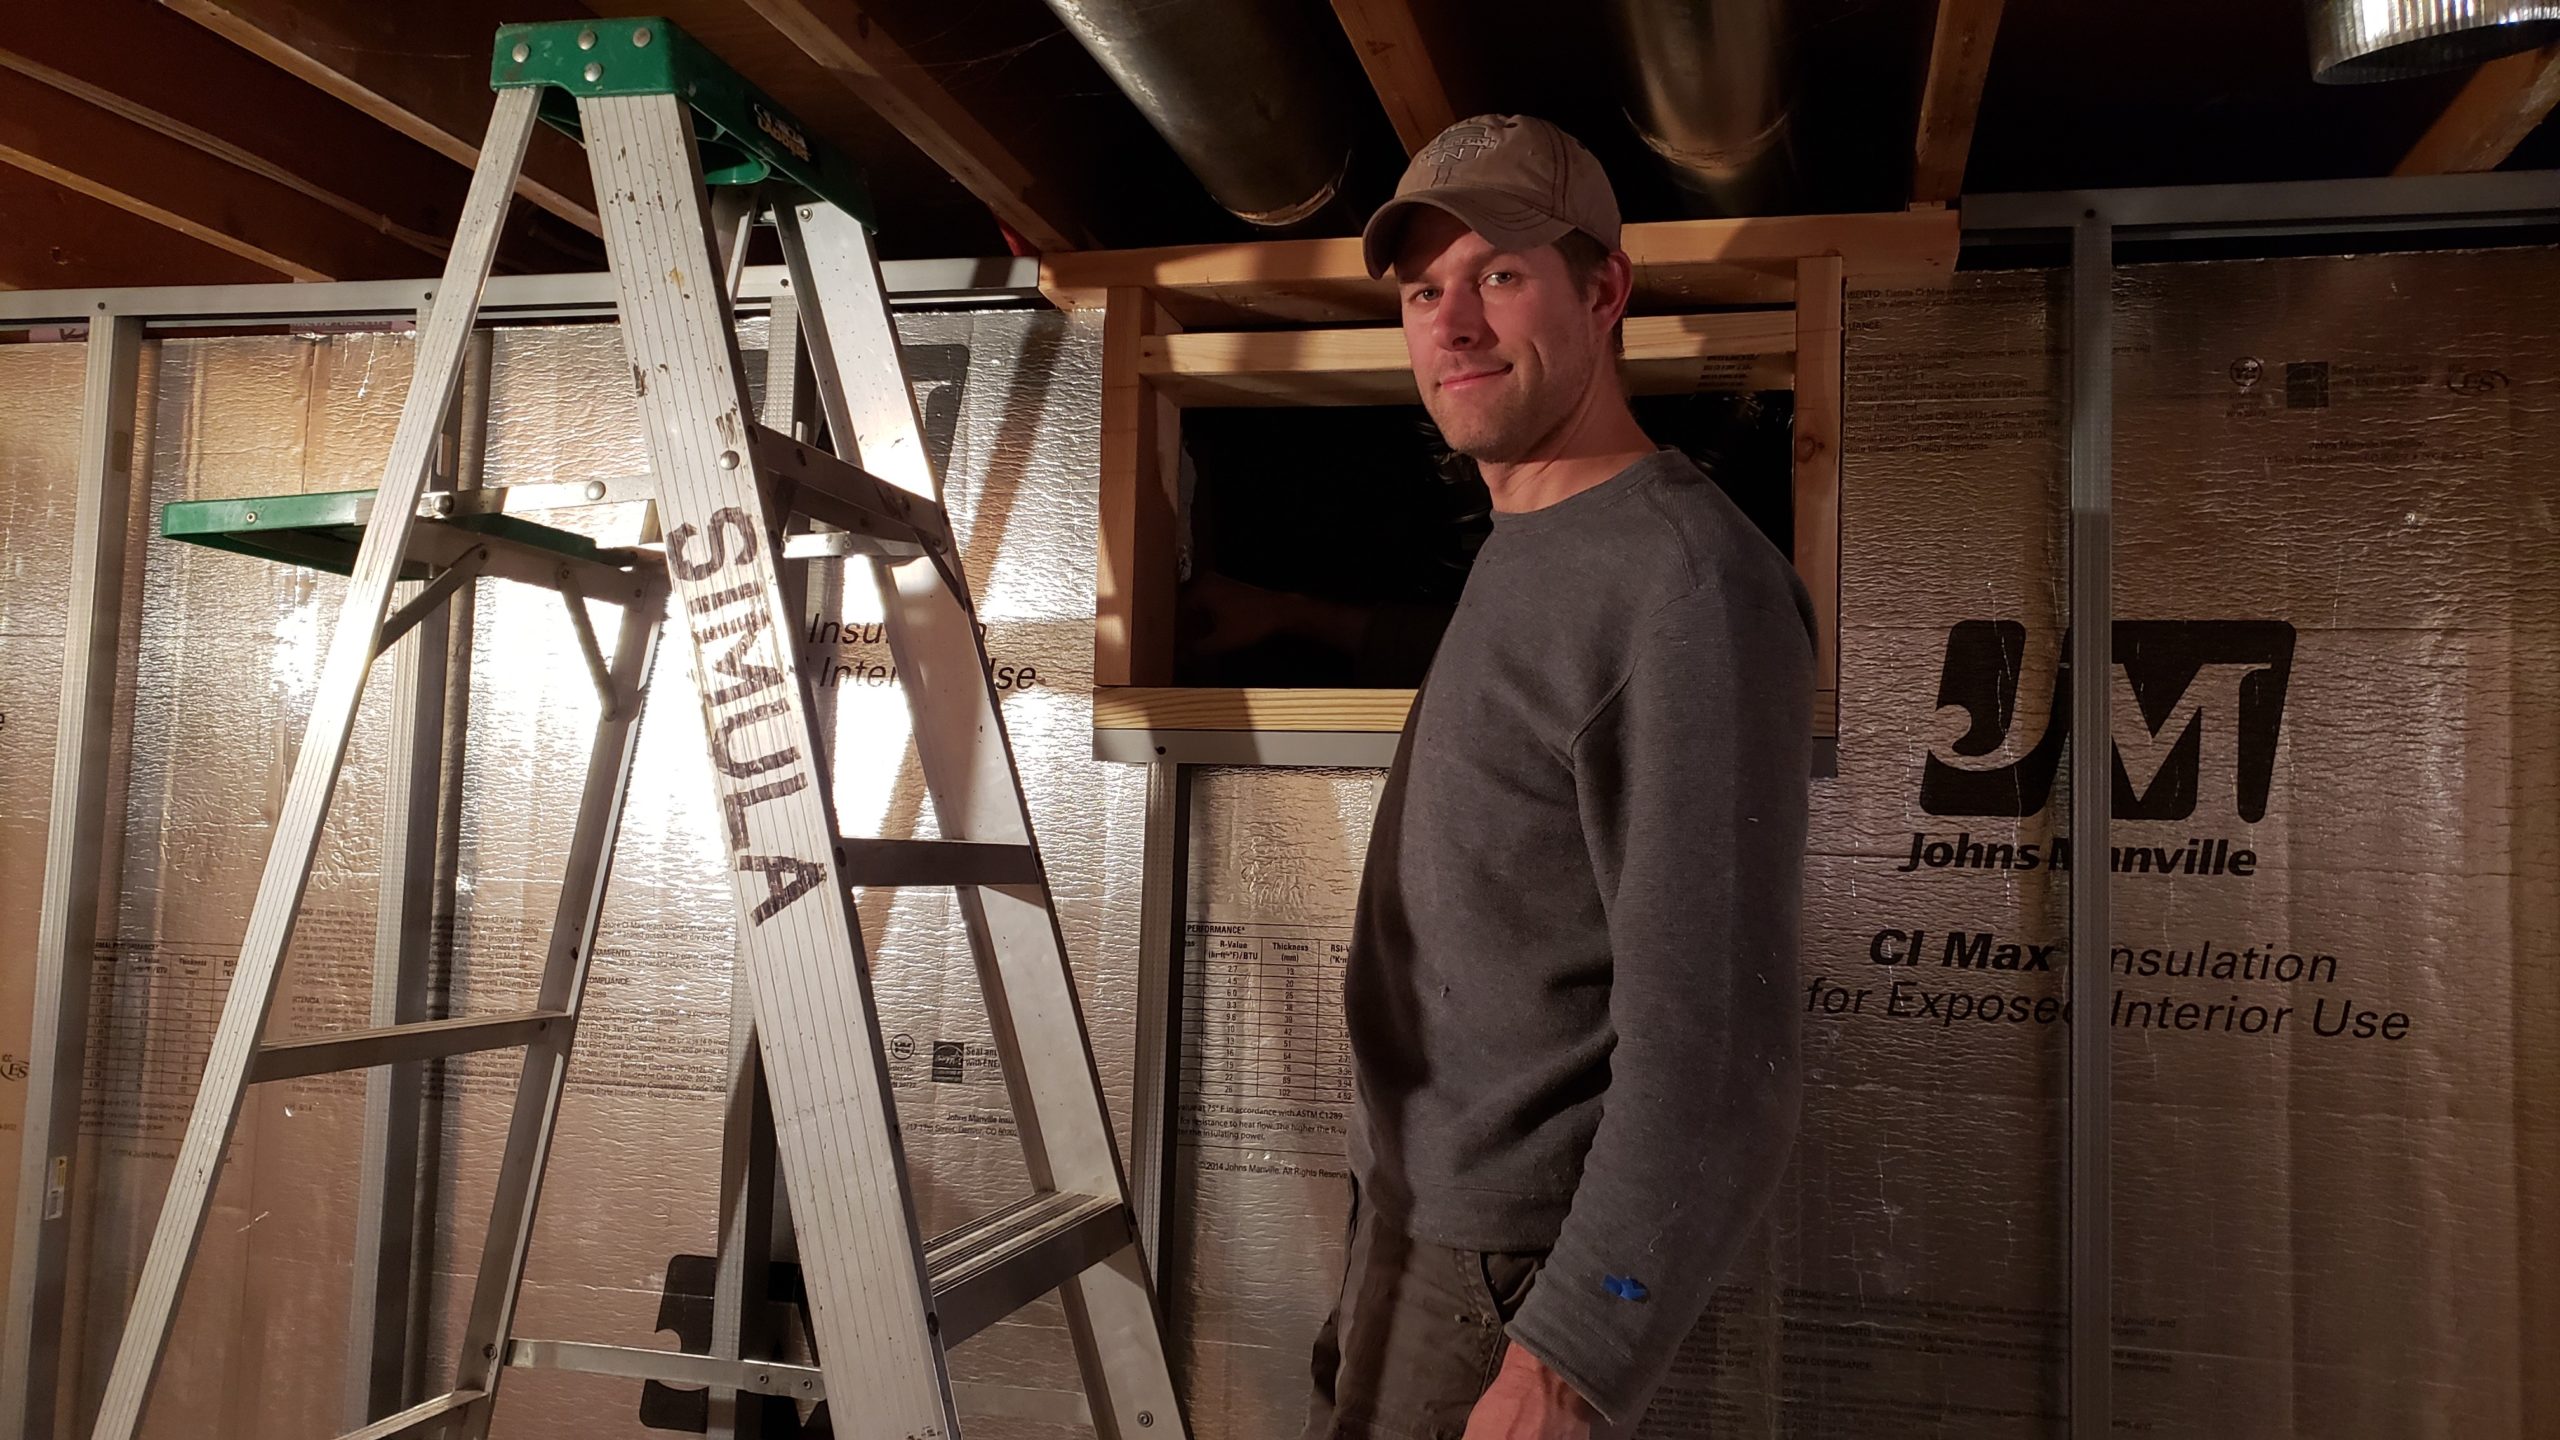
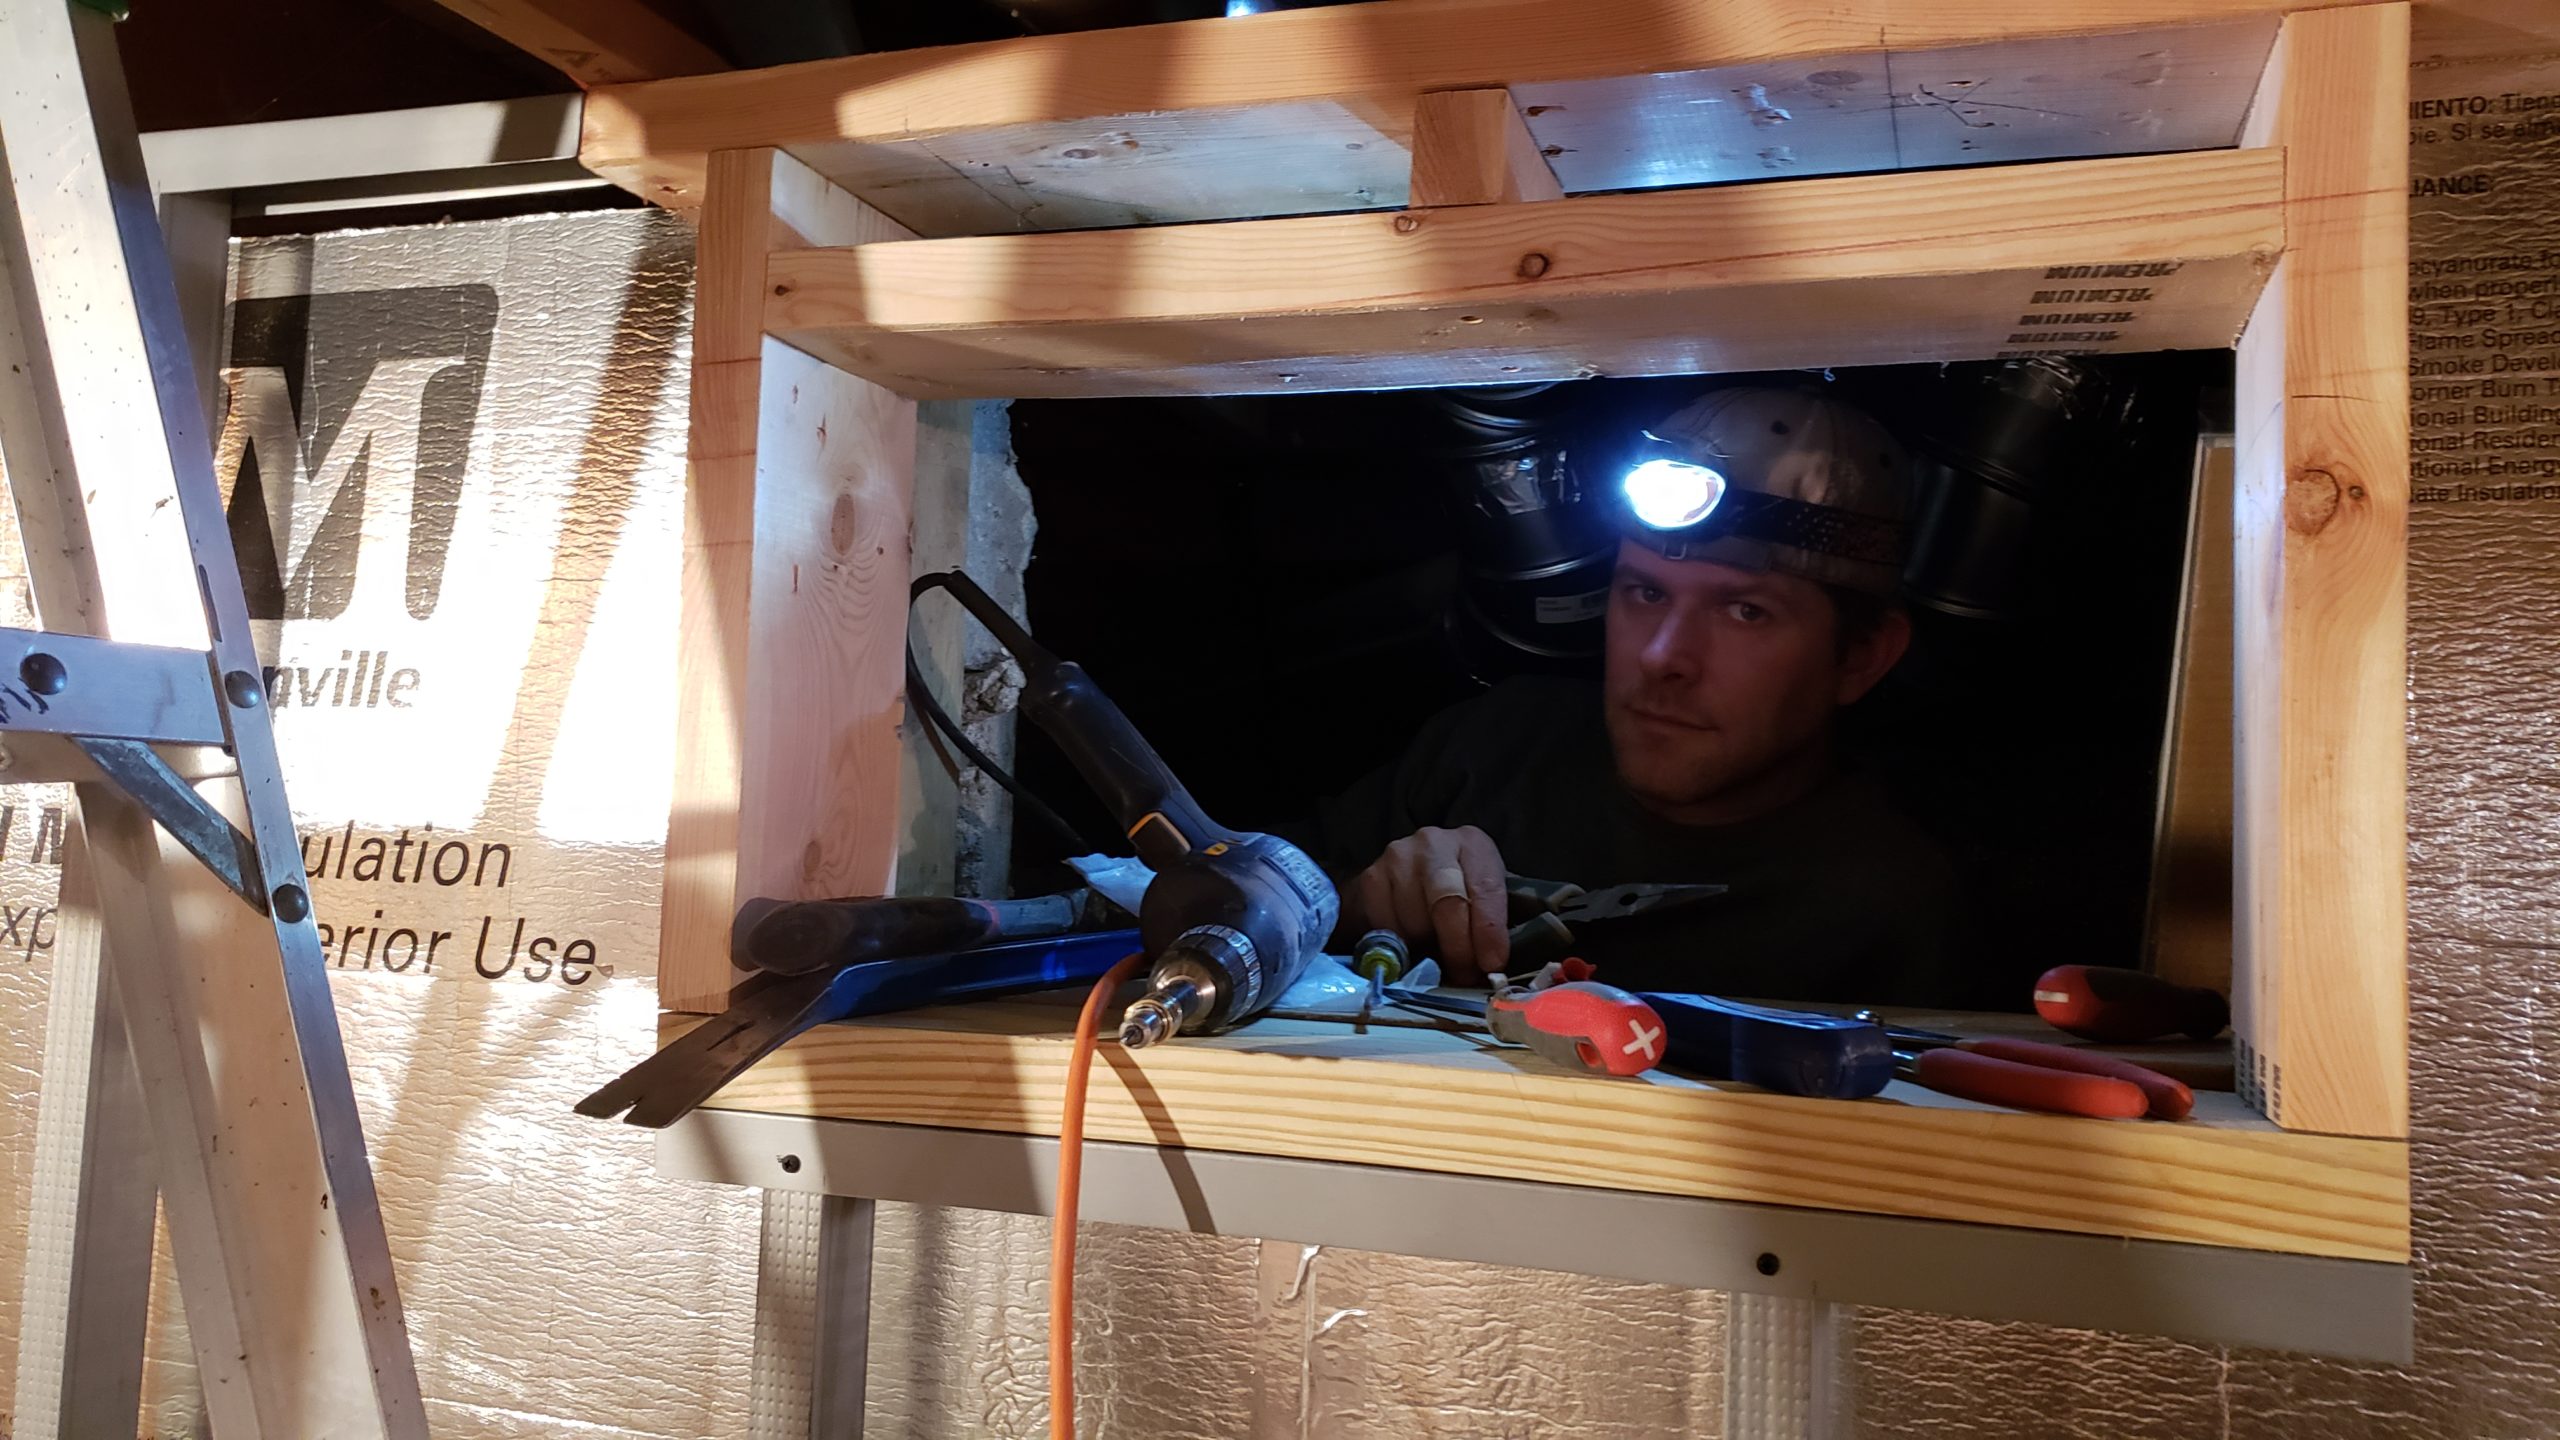
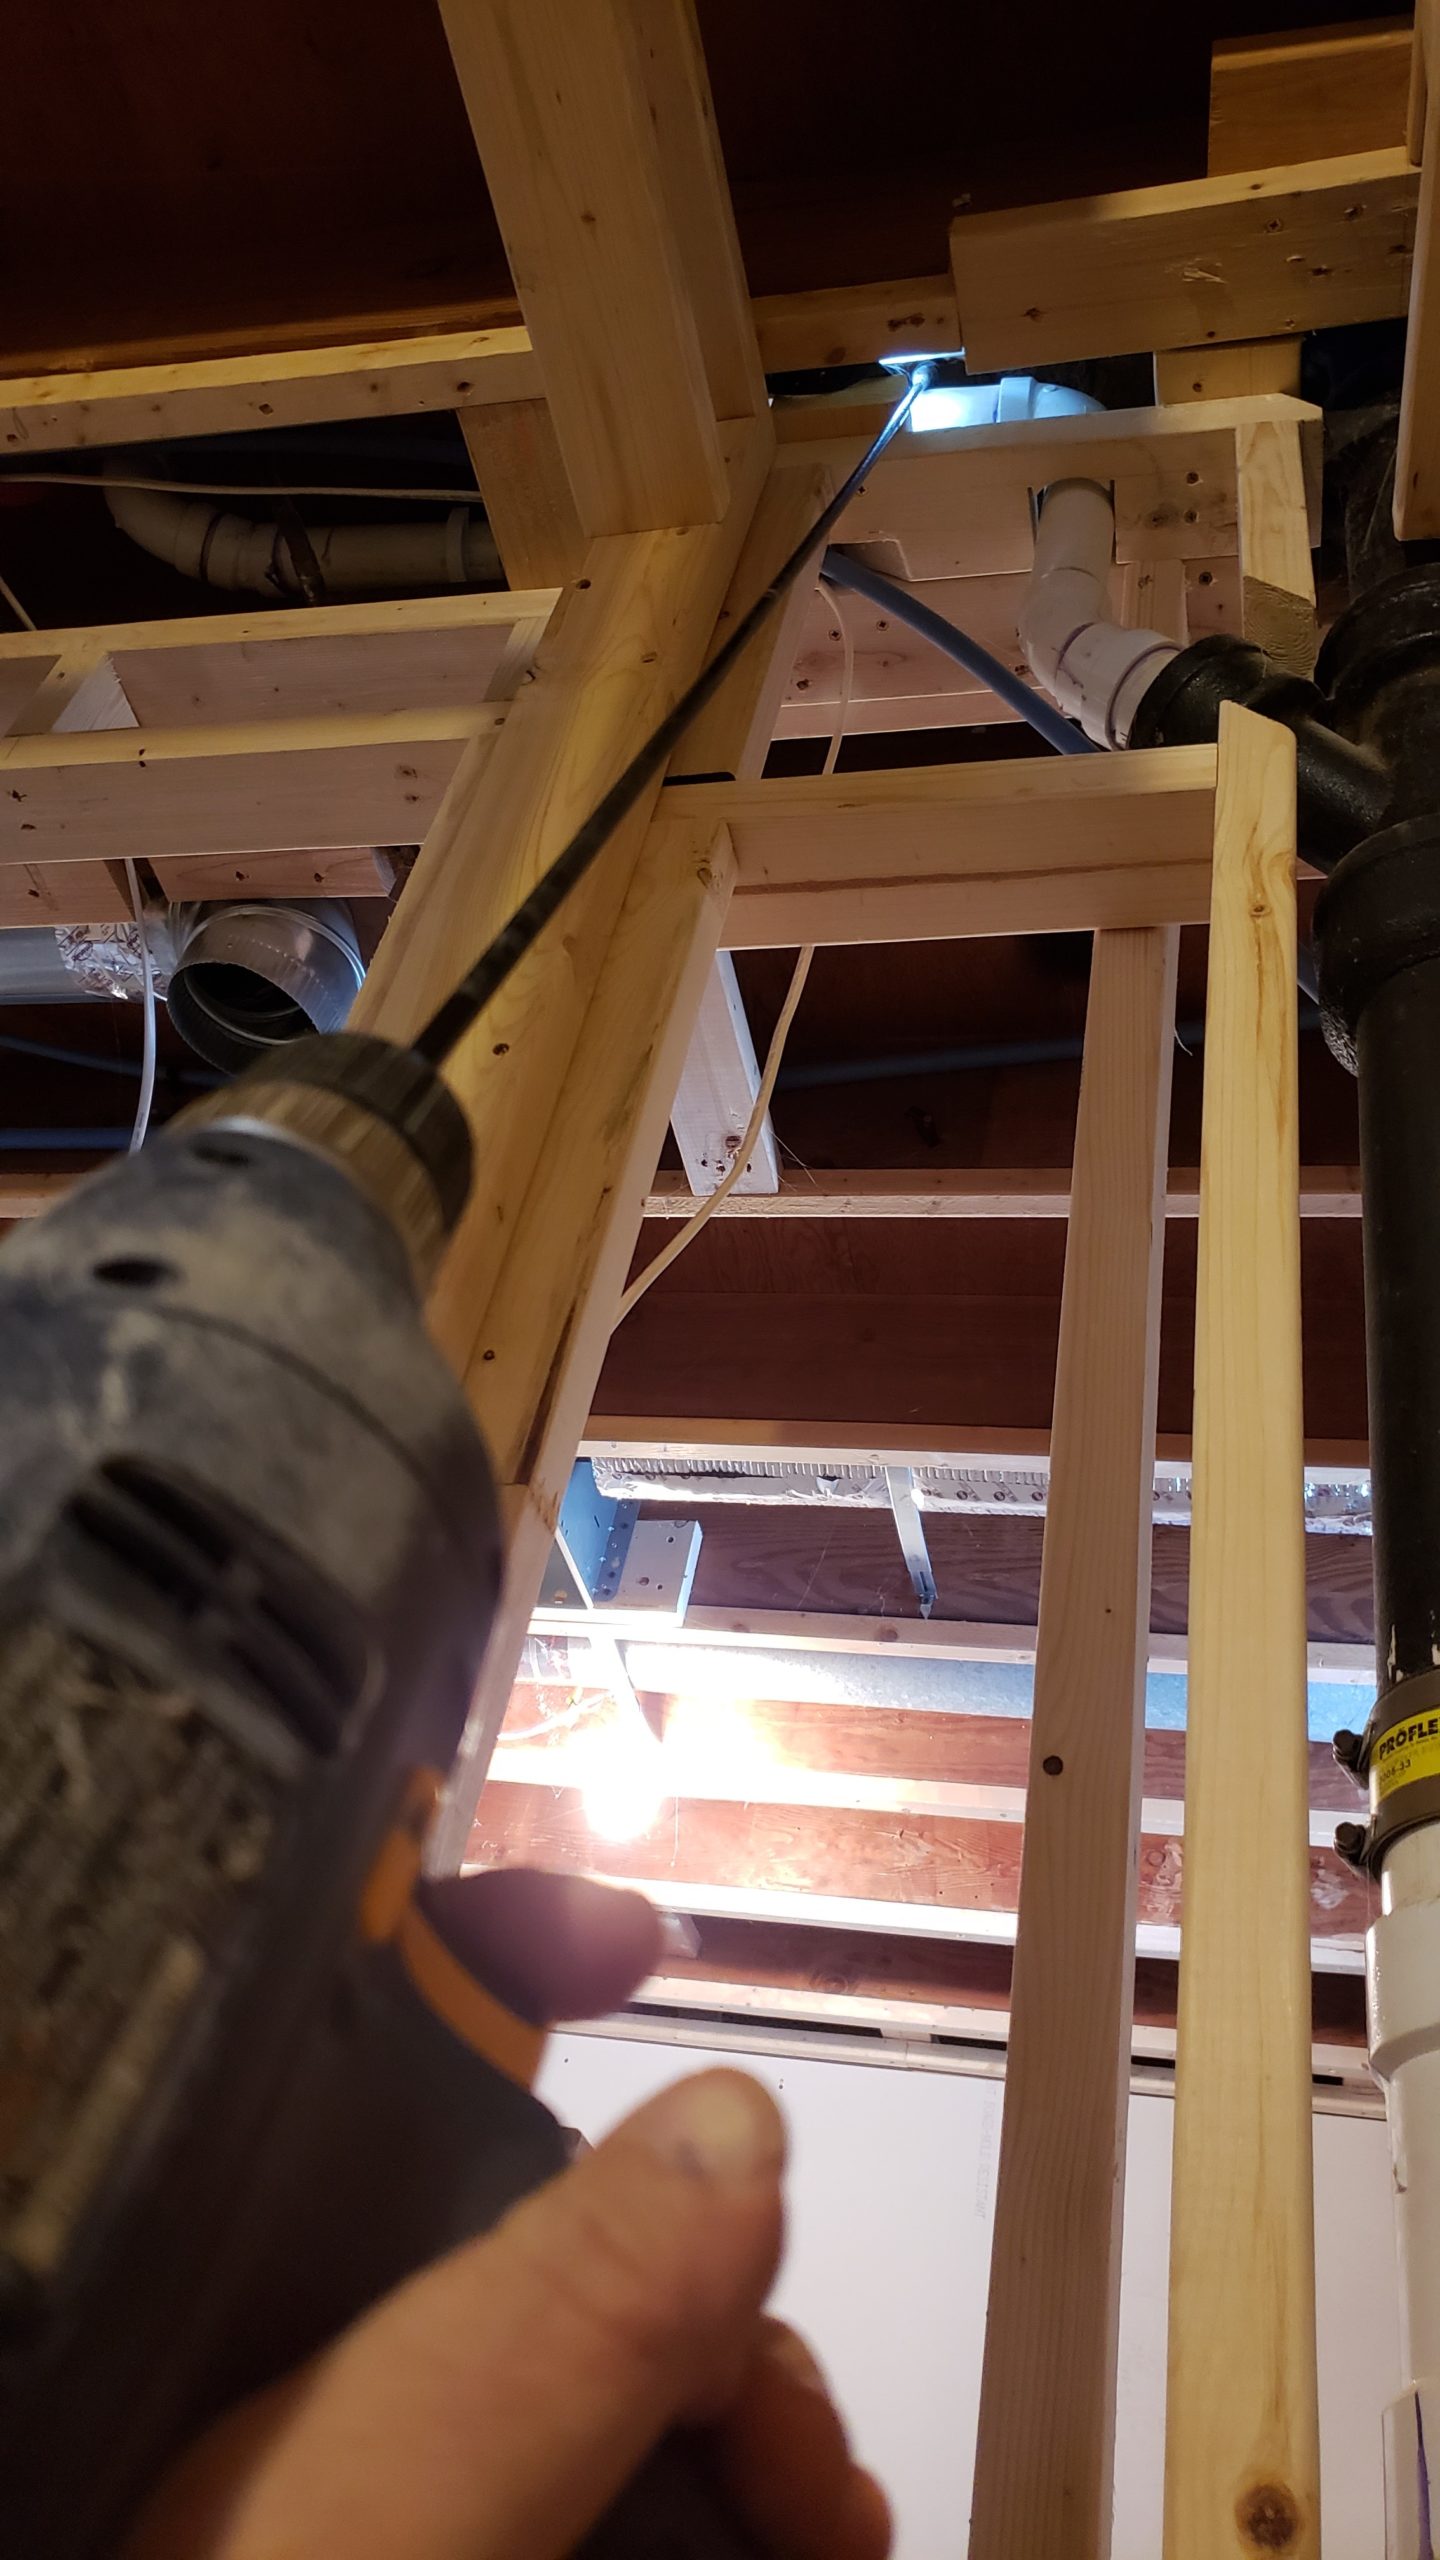
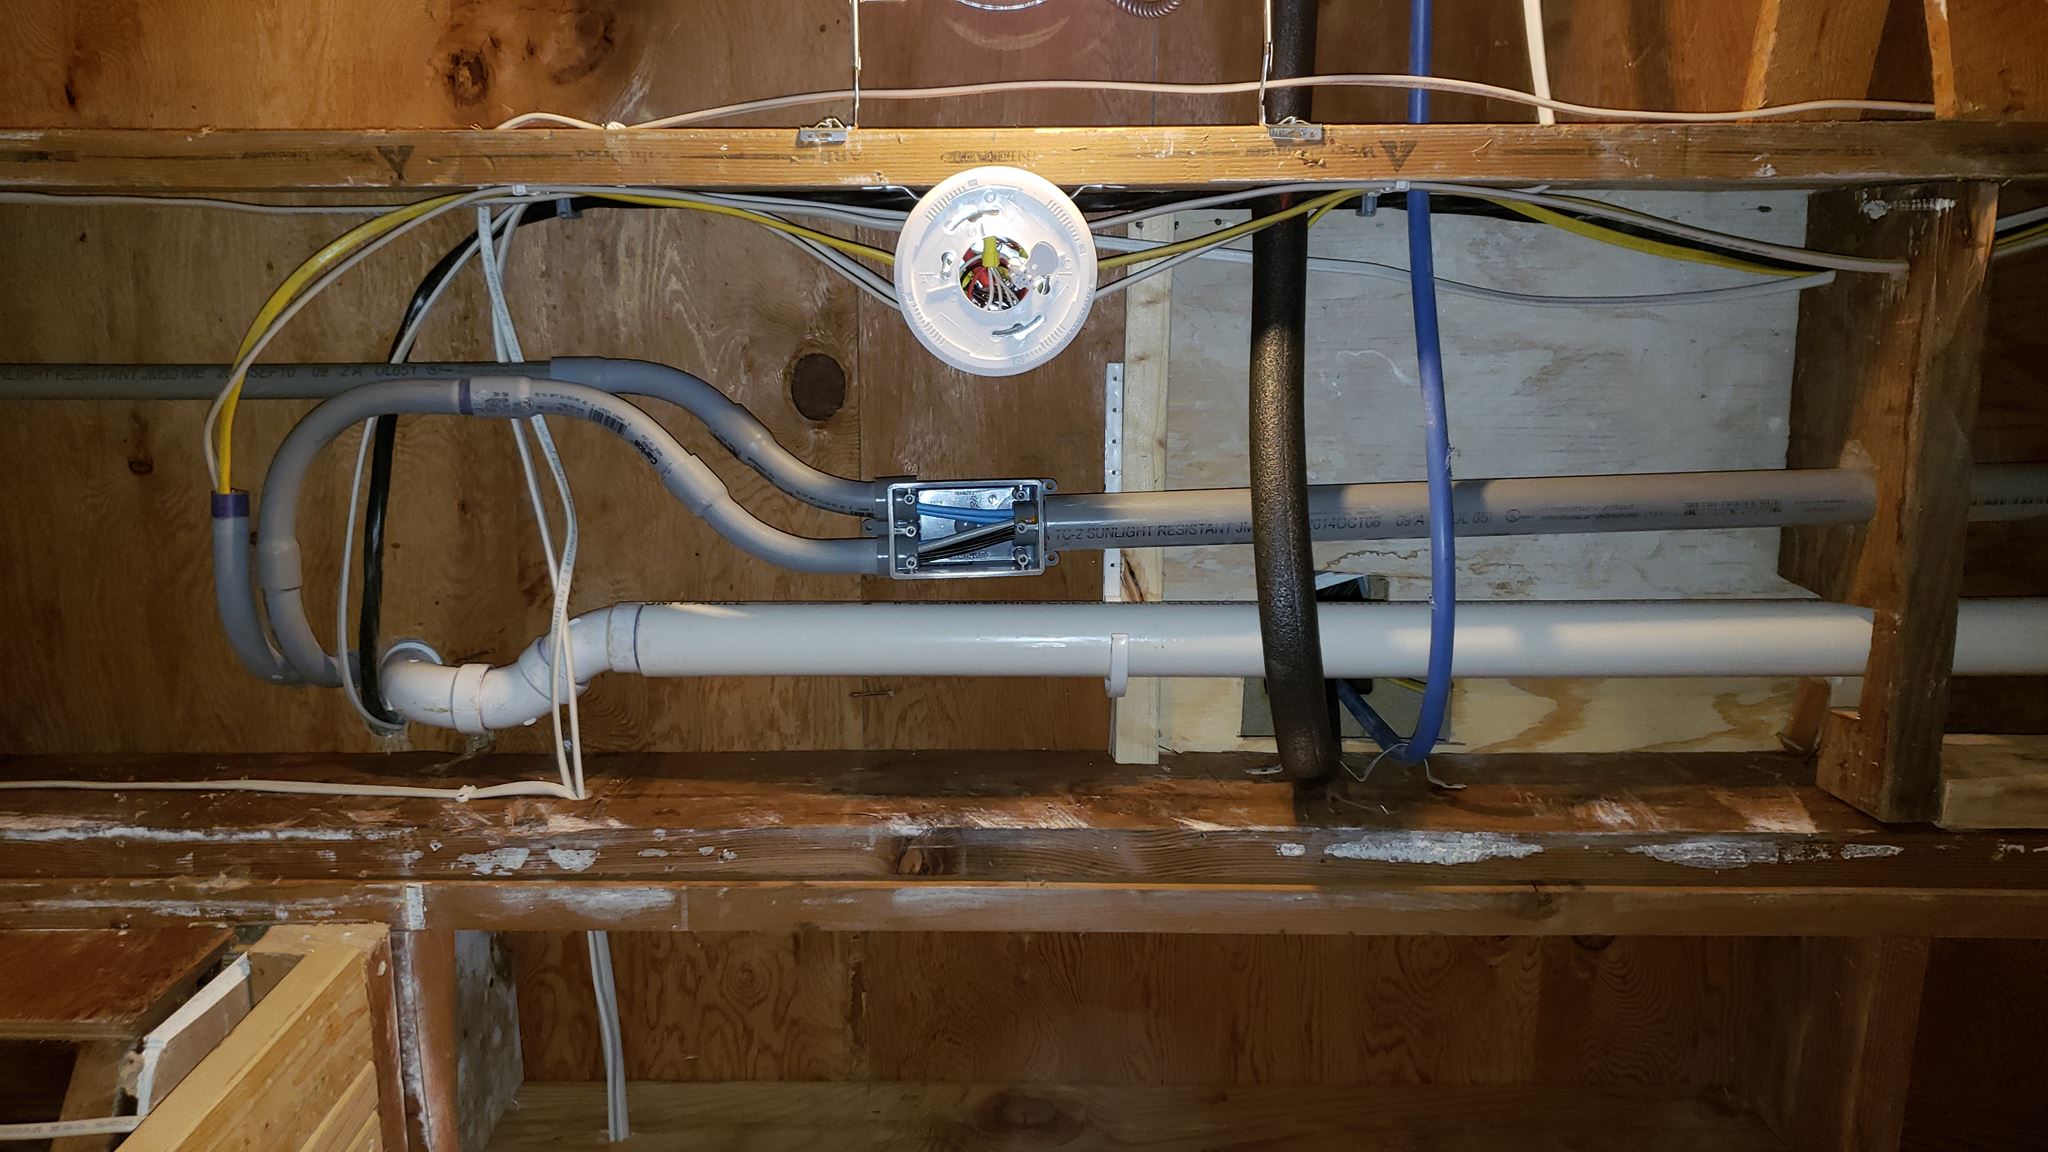
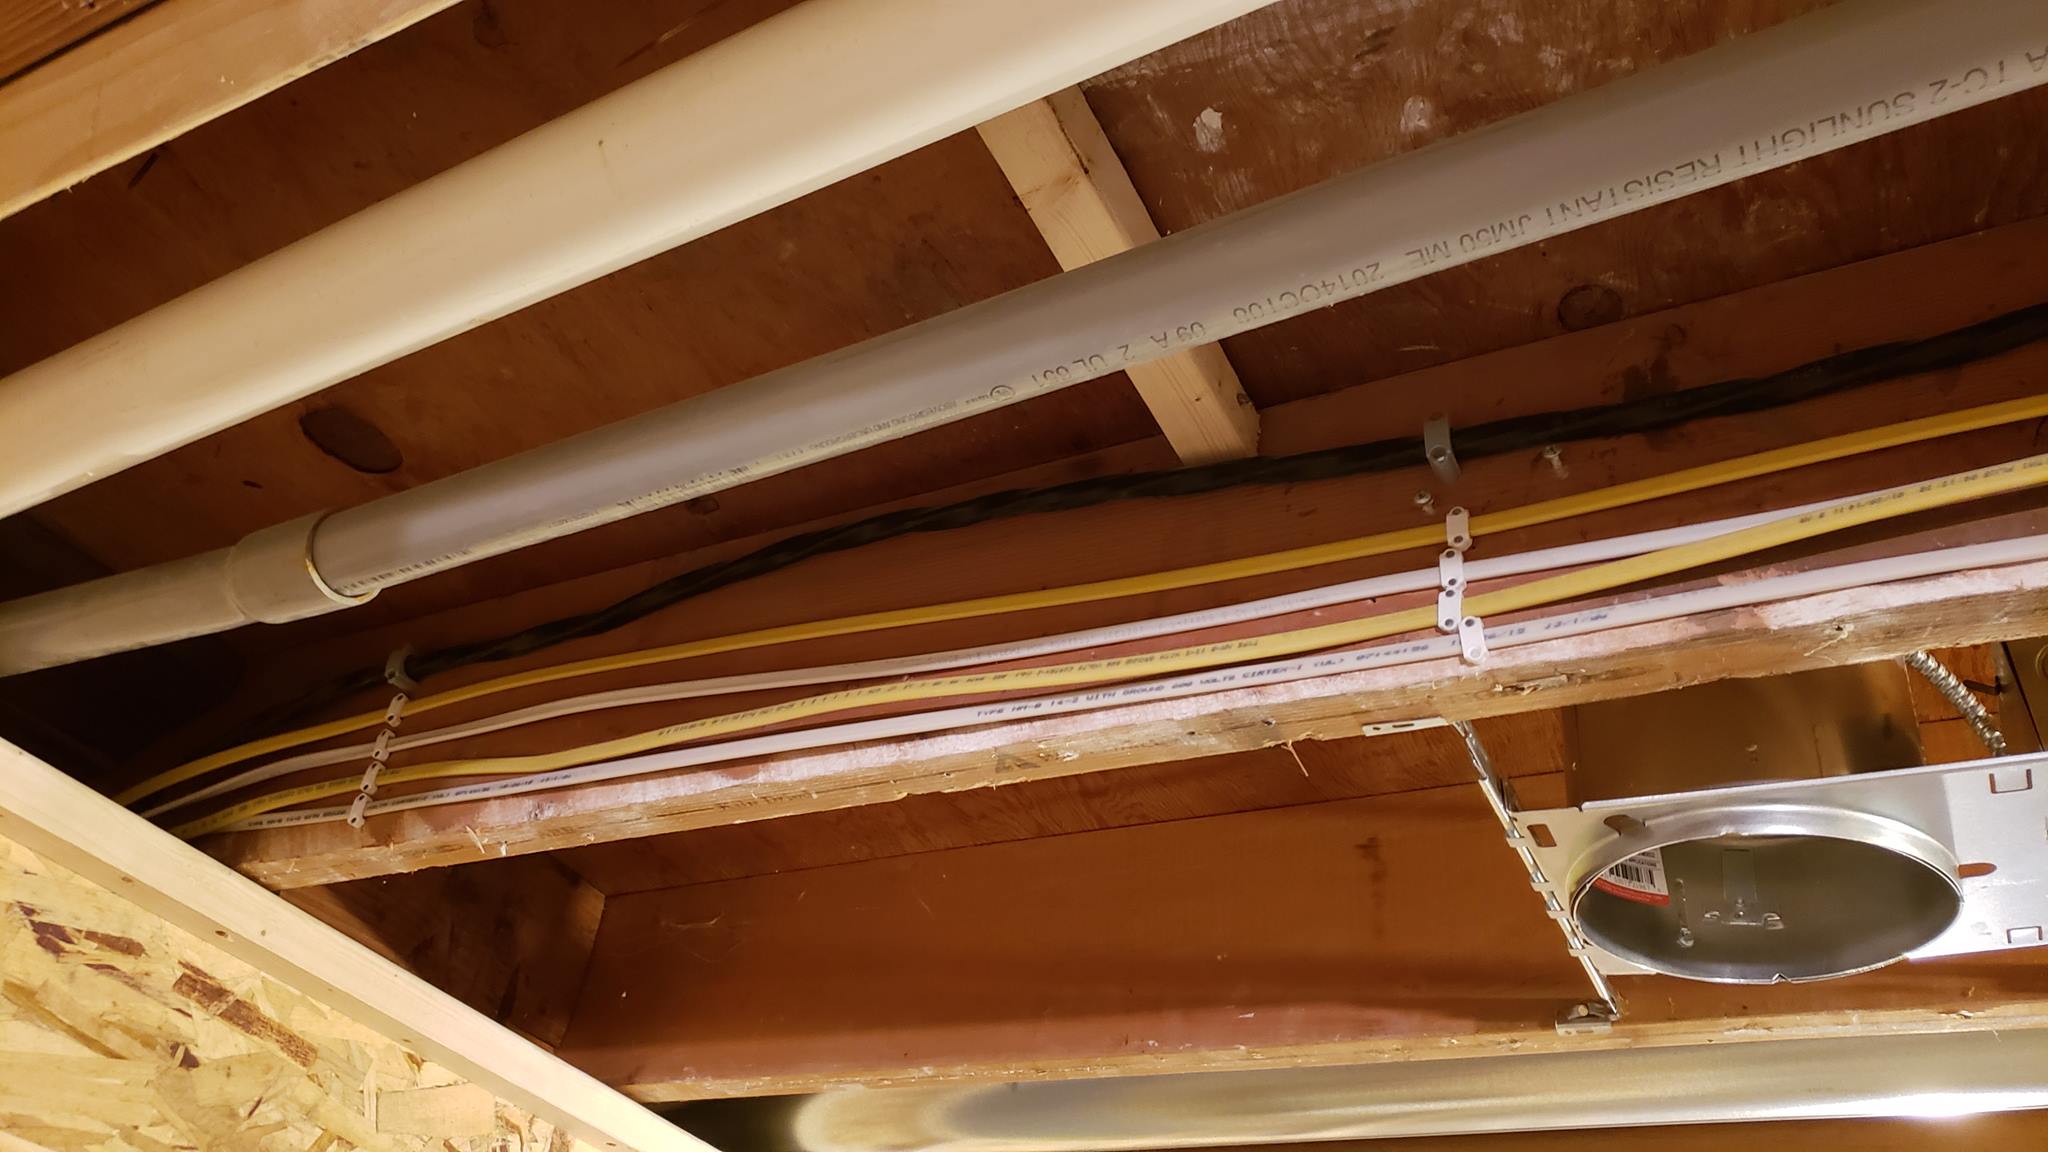
The only way I can get to the dining room wiring is from the crawlspace I found. The last time I was in here, I was fixing heating problems. This time, I’m separating circuits and organizing them into new breakers.
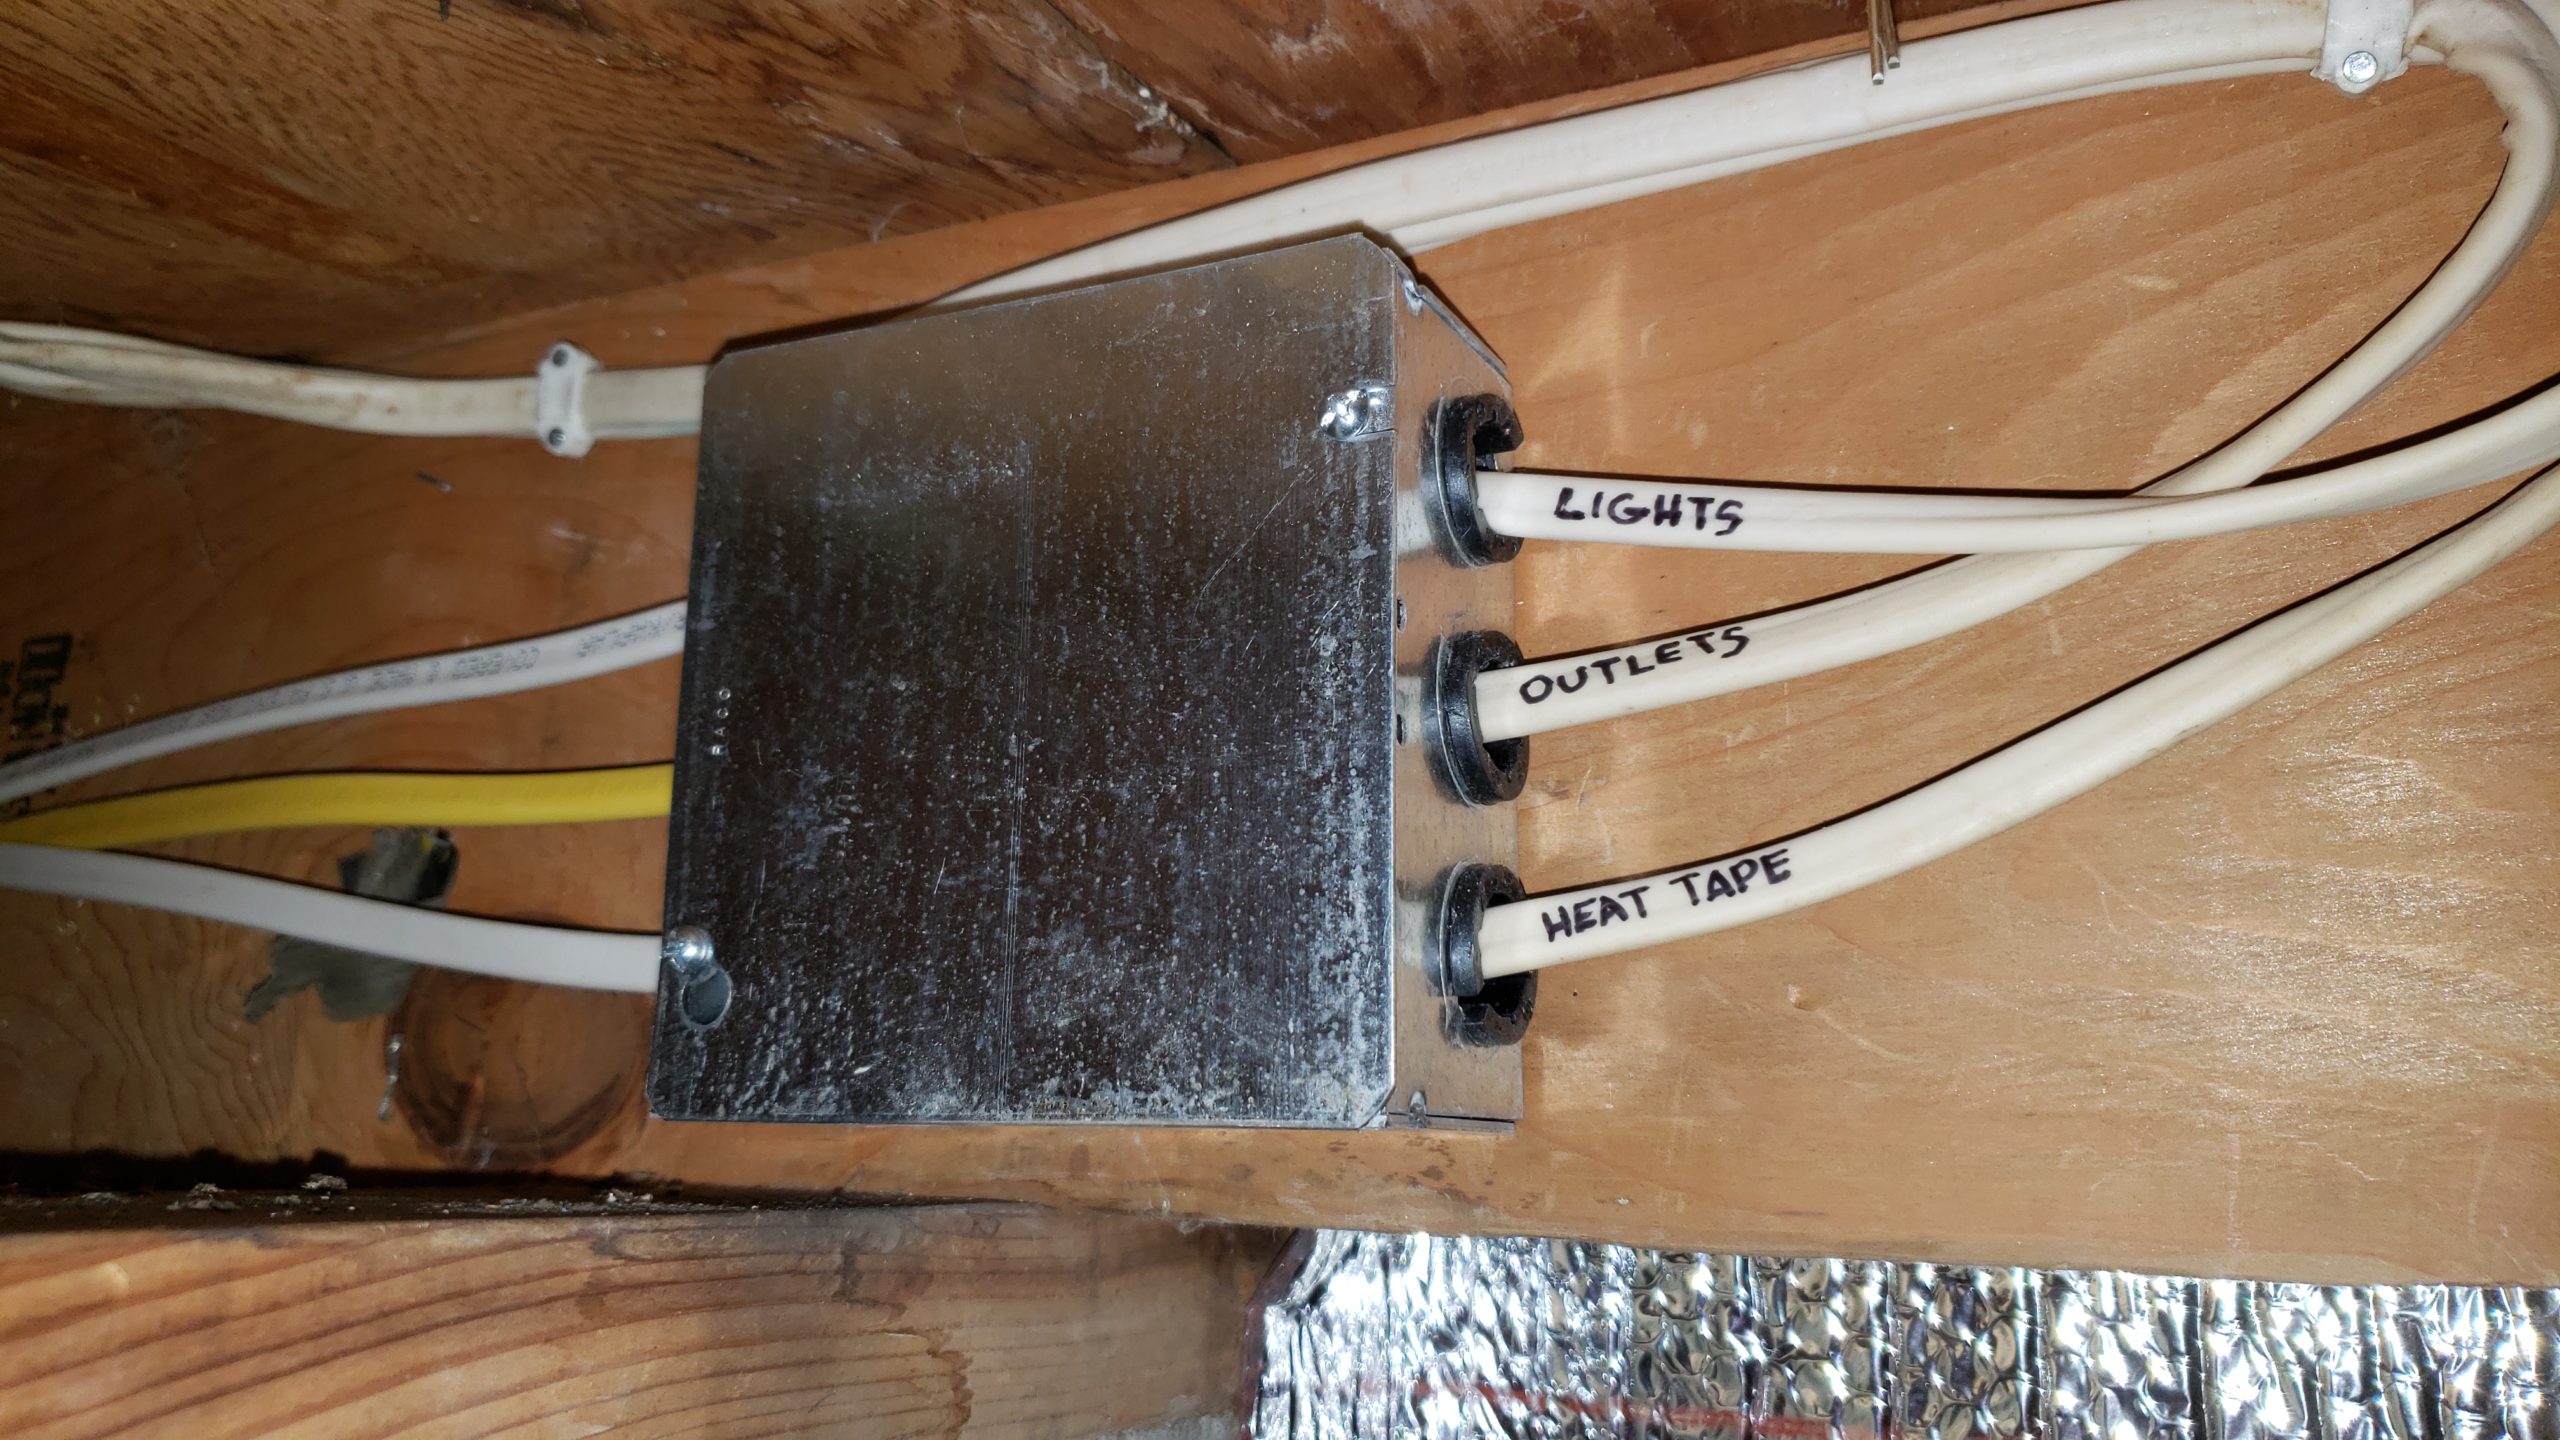
I was able to add a new junction box inside the crawlspace. There’s something so satisfying about labeling your work so you don’t have to guess what each item does.
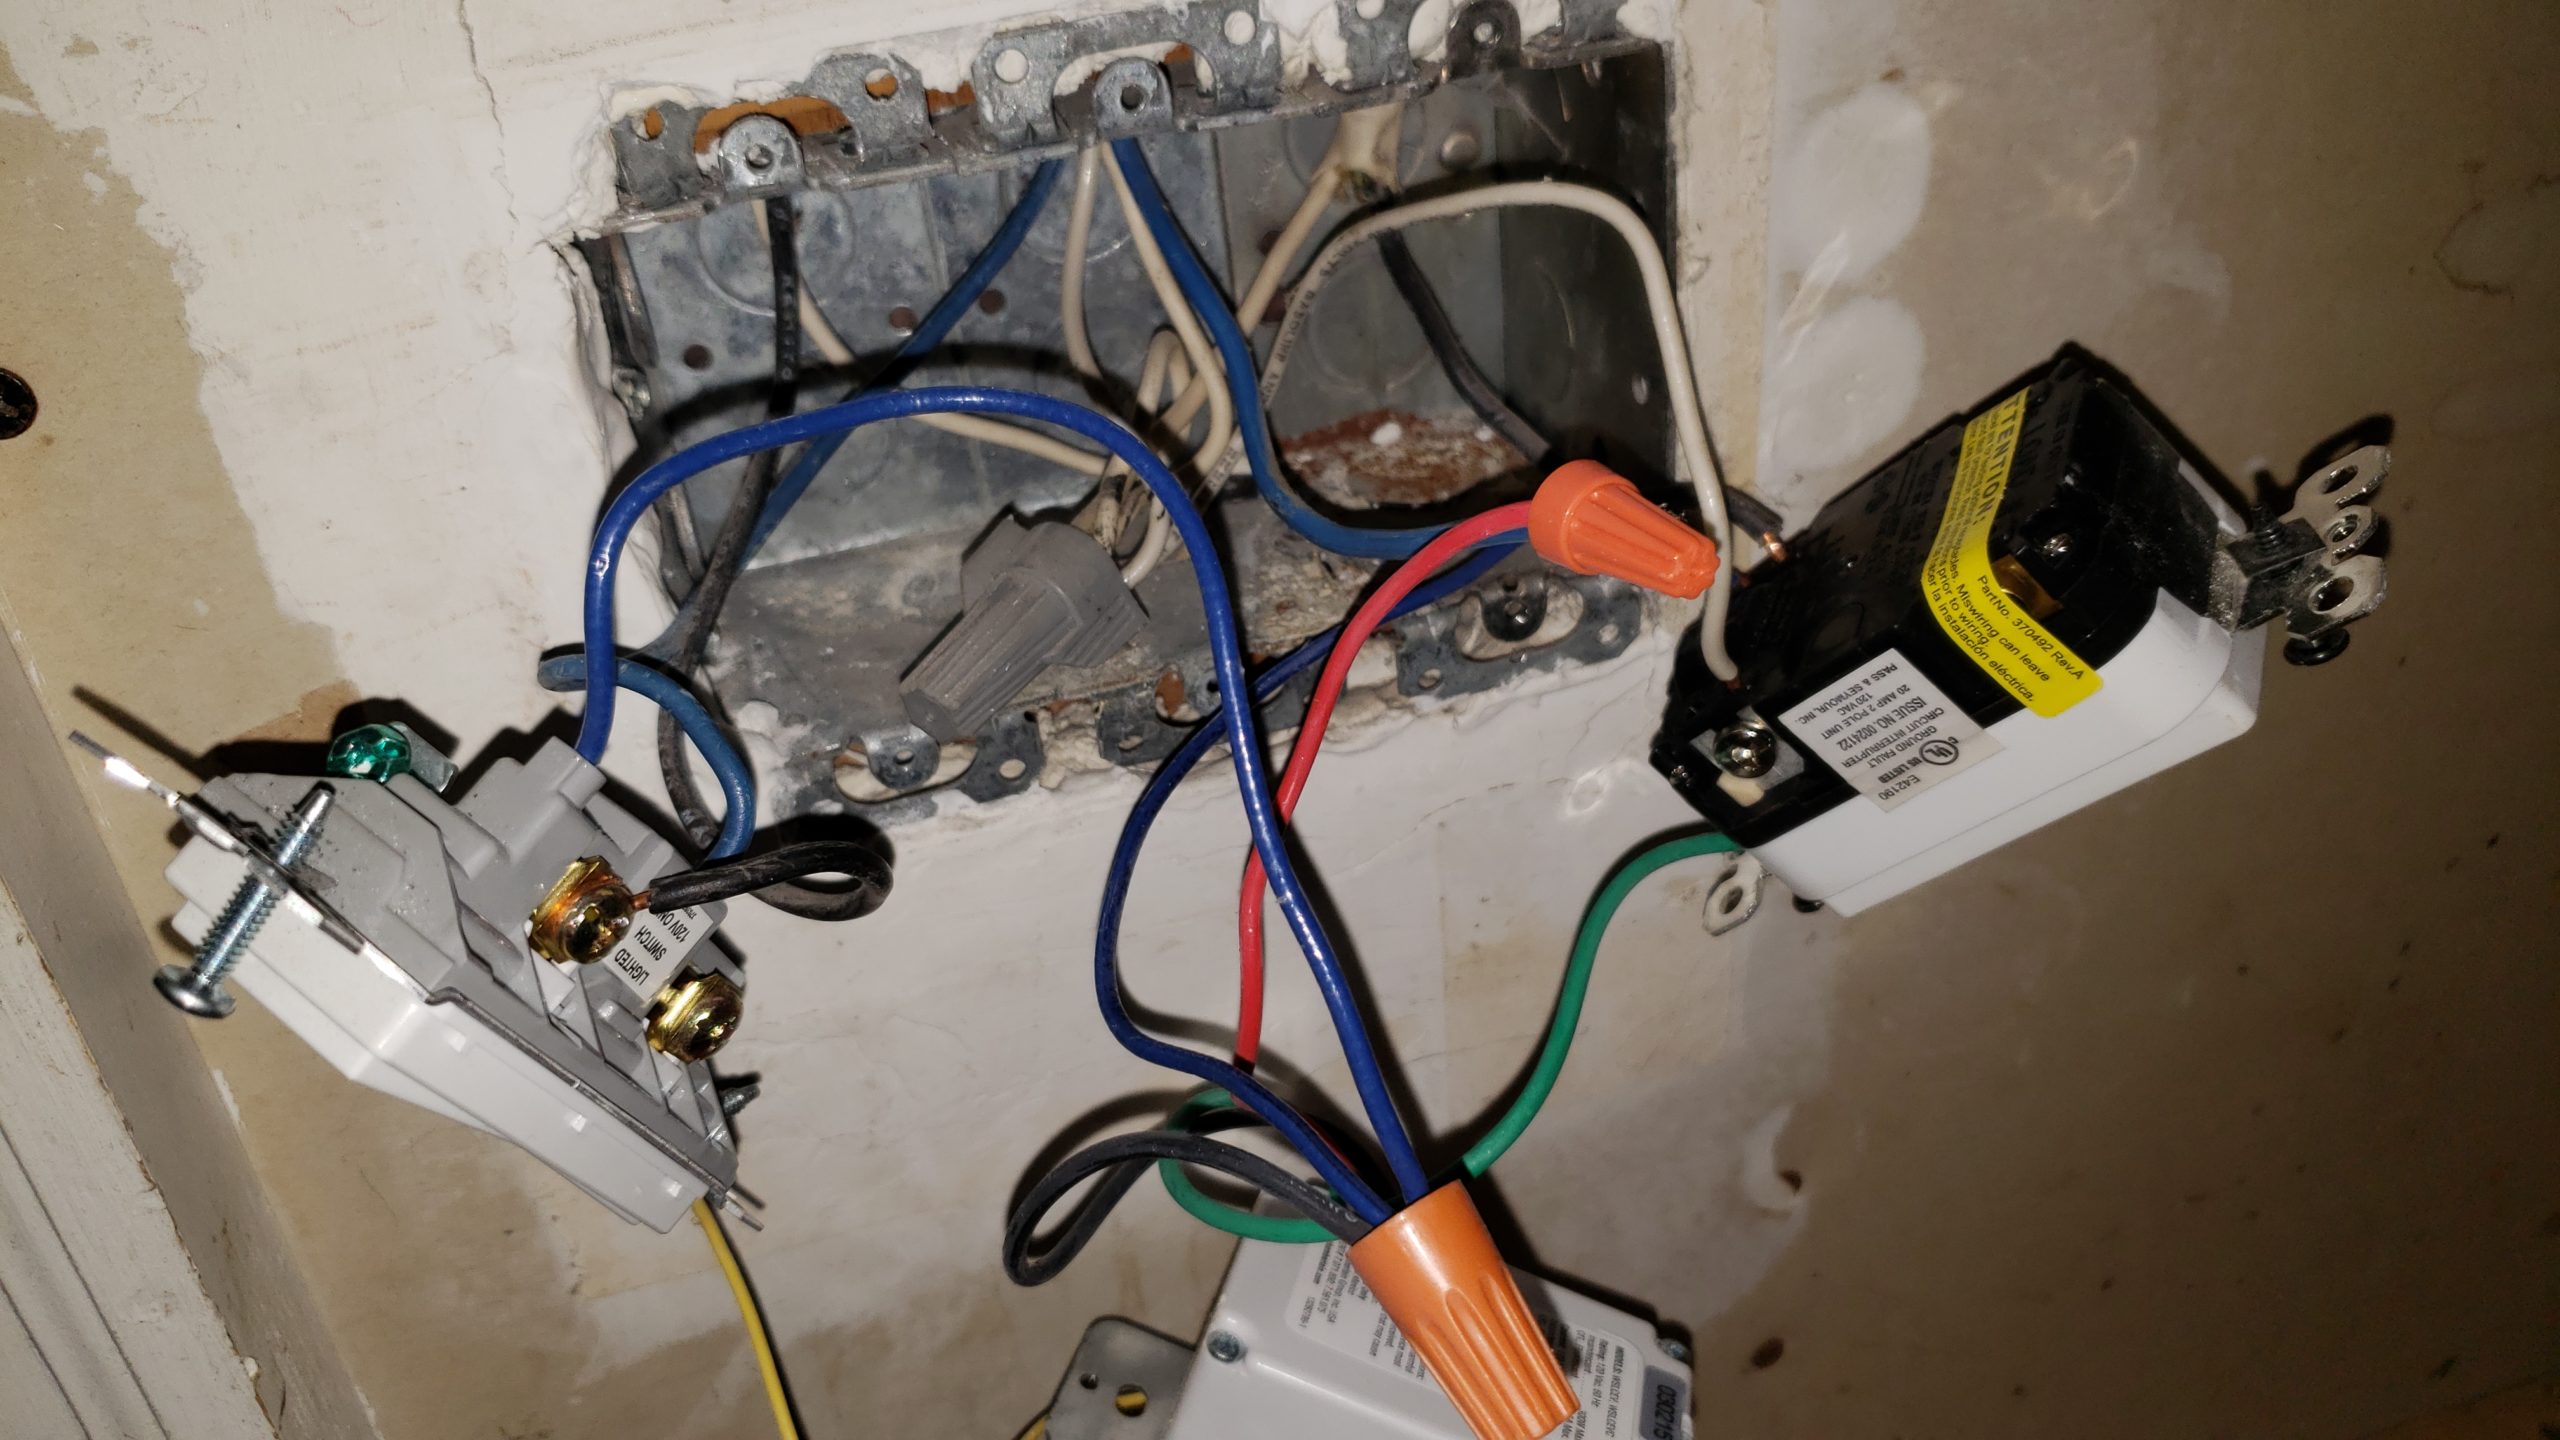
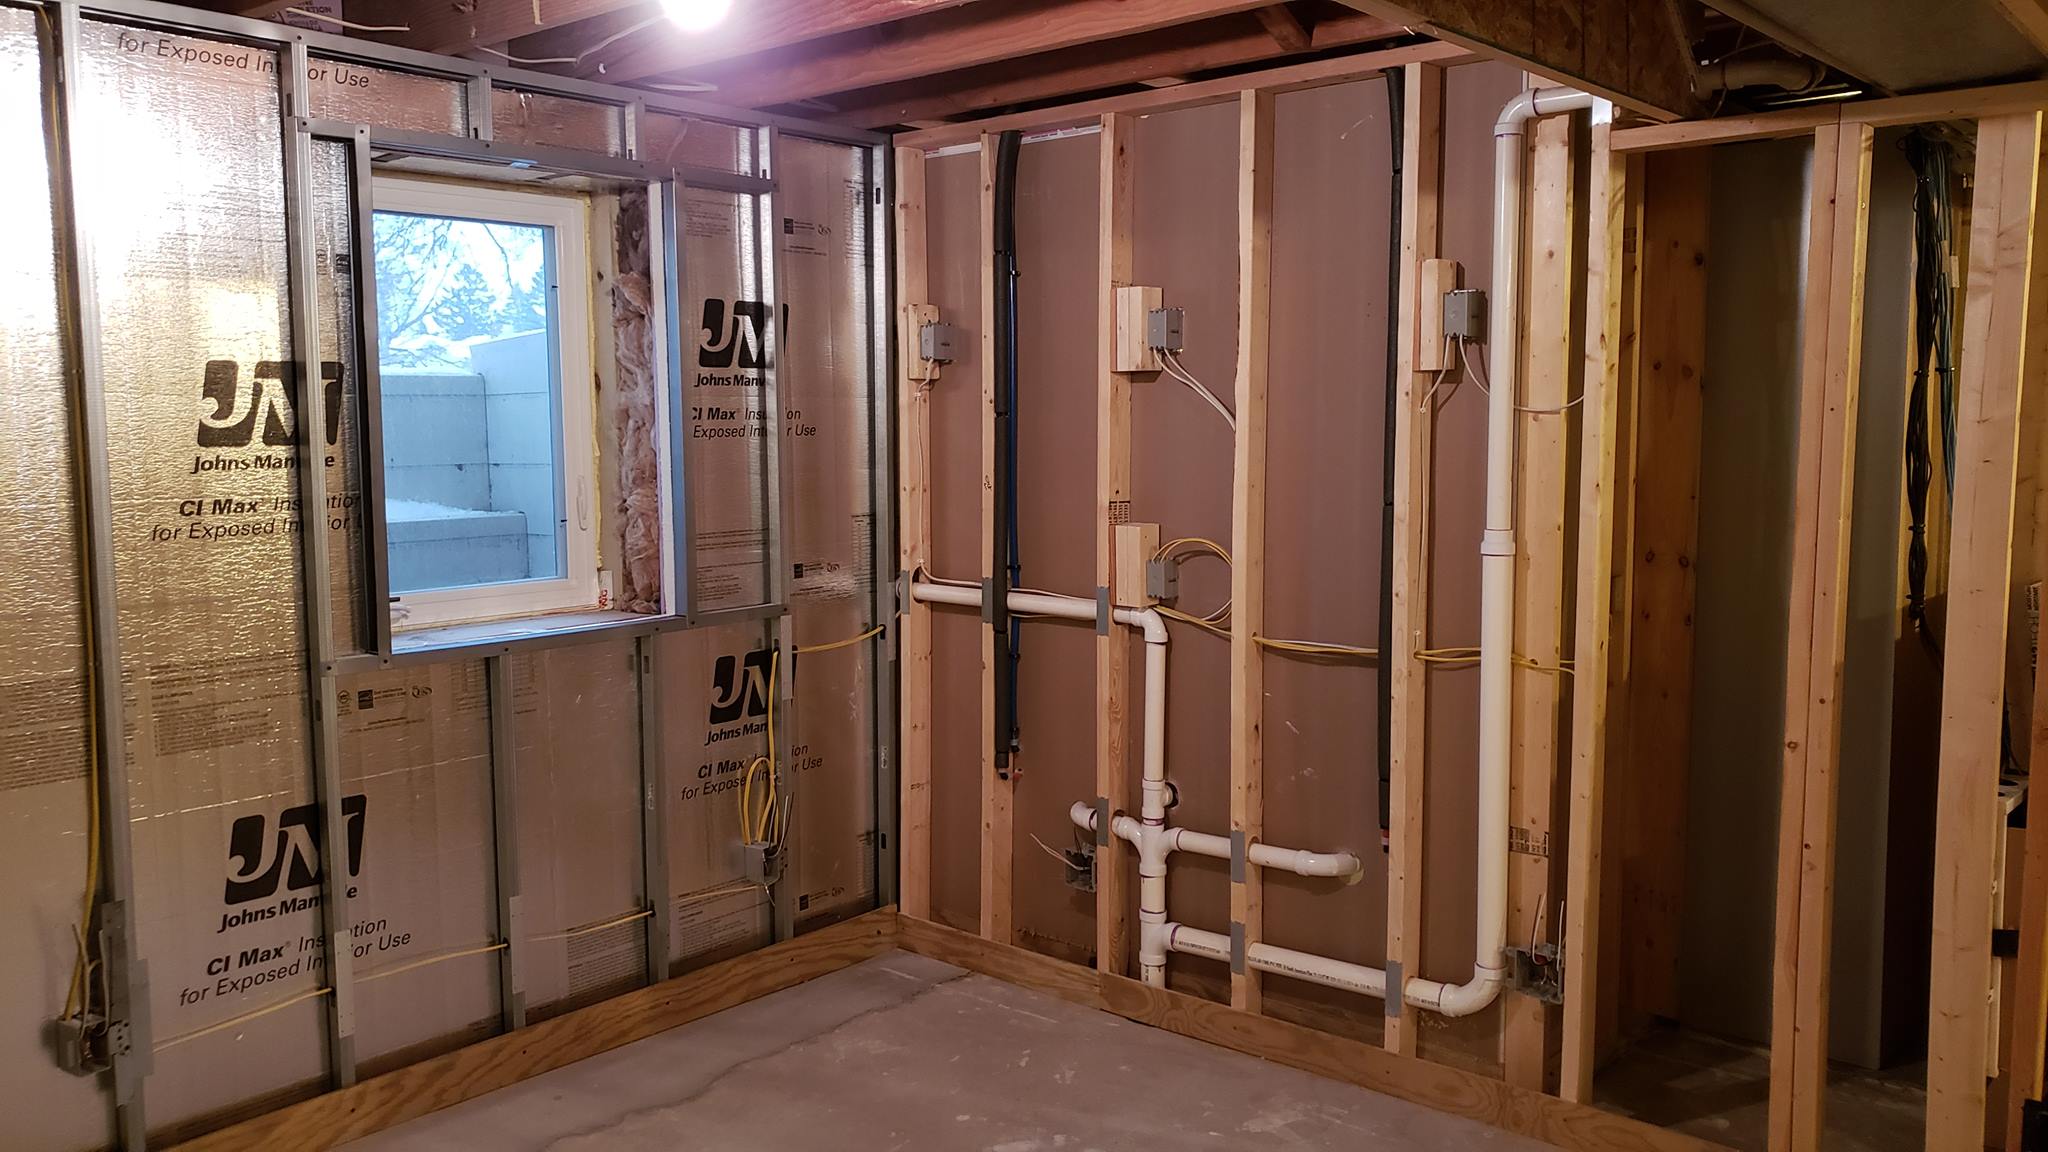
It’s a good idea to have a bathroom on its own circuit. But in this house, many of the rooms share the same circuit! To untangle the mess, I must run new wires to the switches and outlets. Also, there’s only one, so Amáda asked me to install a second outlet. She couldn’t have picked a trickier spot. I have to drill a wiring hole in the basement ceiling between tight pipes and framing.
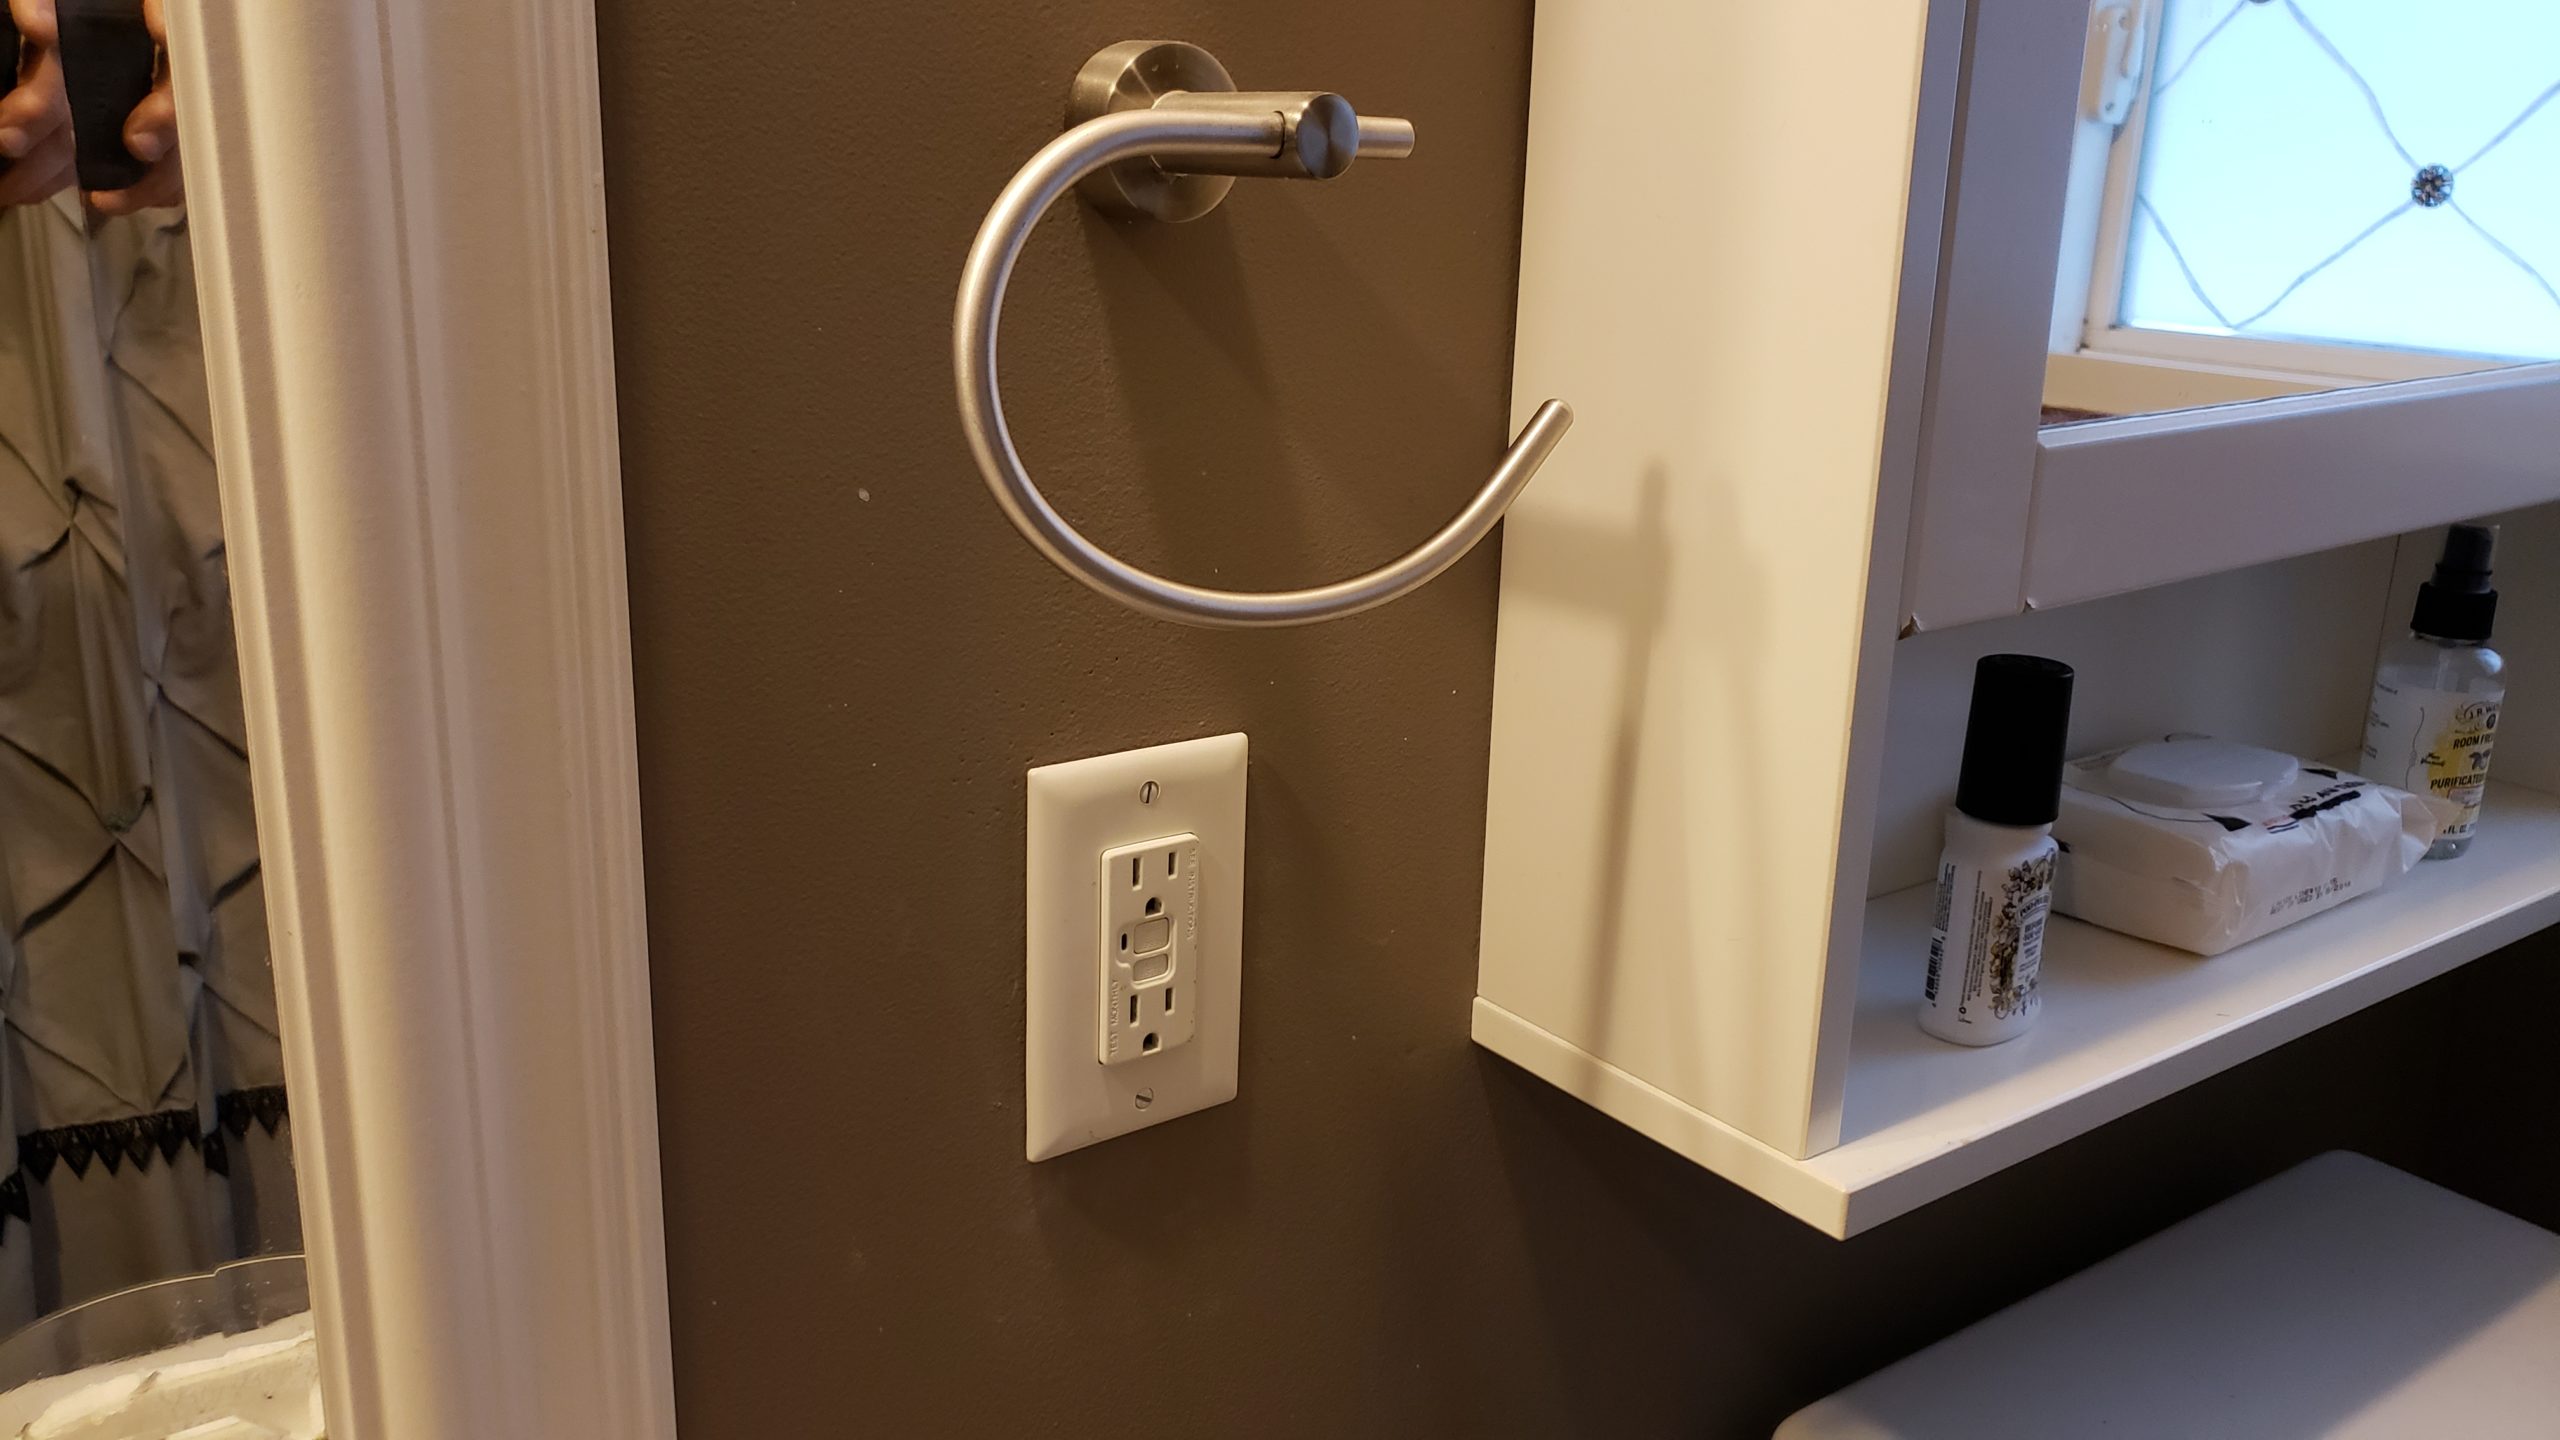
The finished outlet is a great convenience, though. It’s on the right side of the sink. The other is far to the left, part of the same junction box as the light switch.
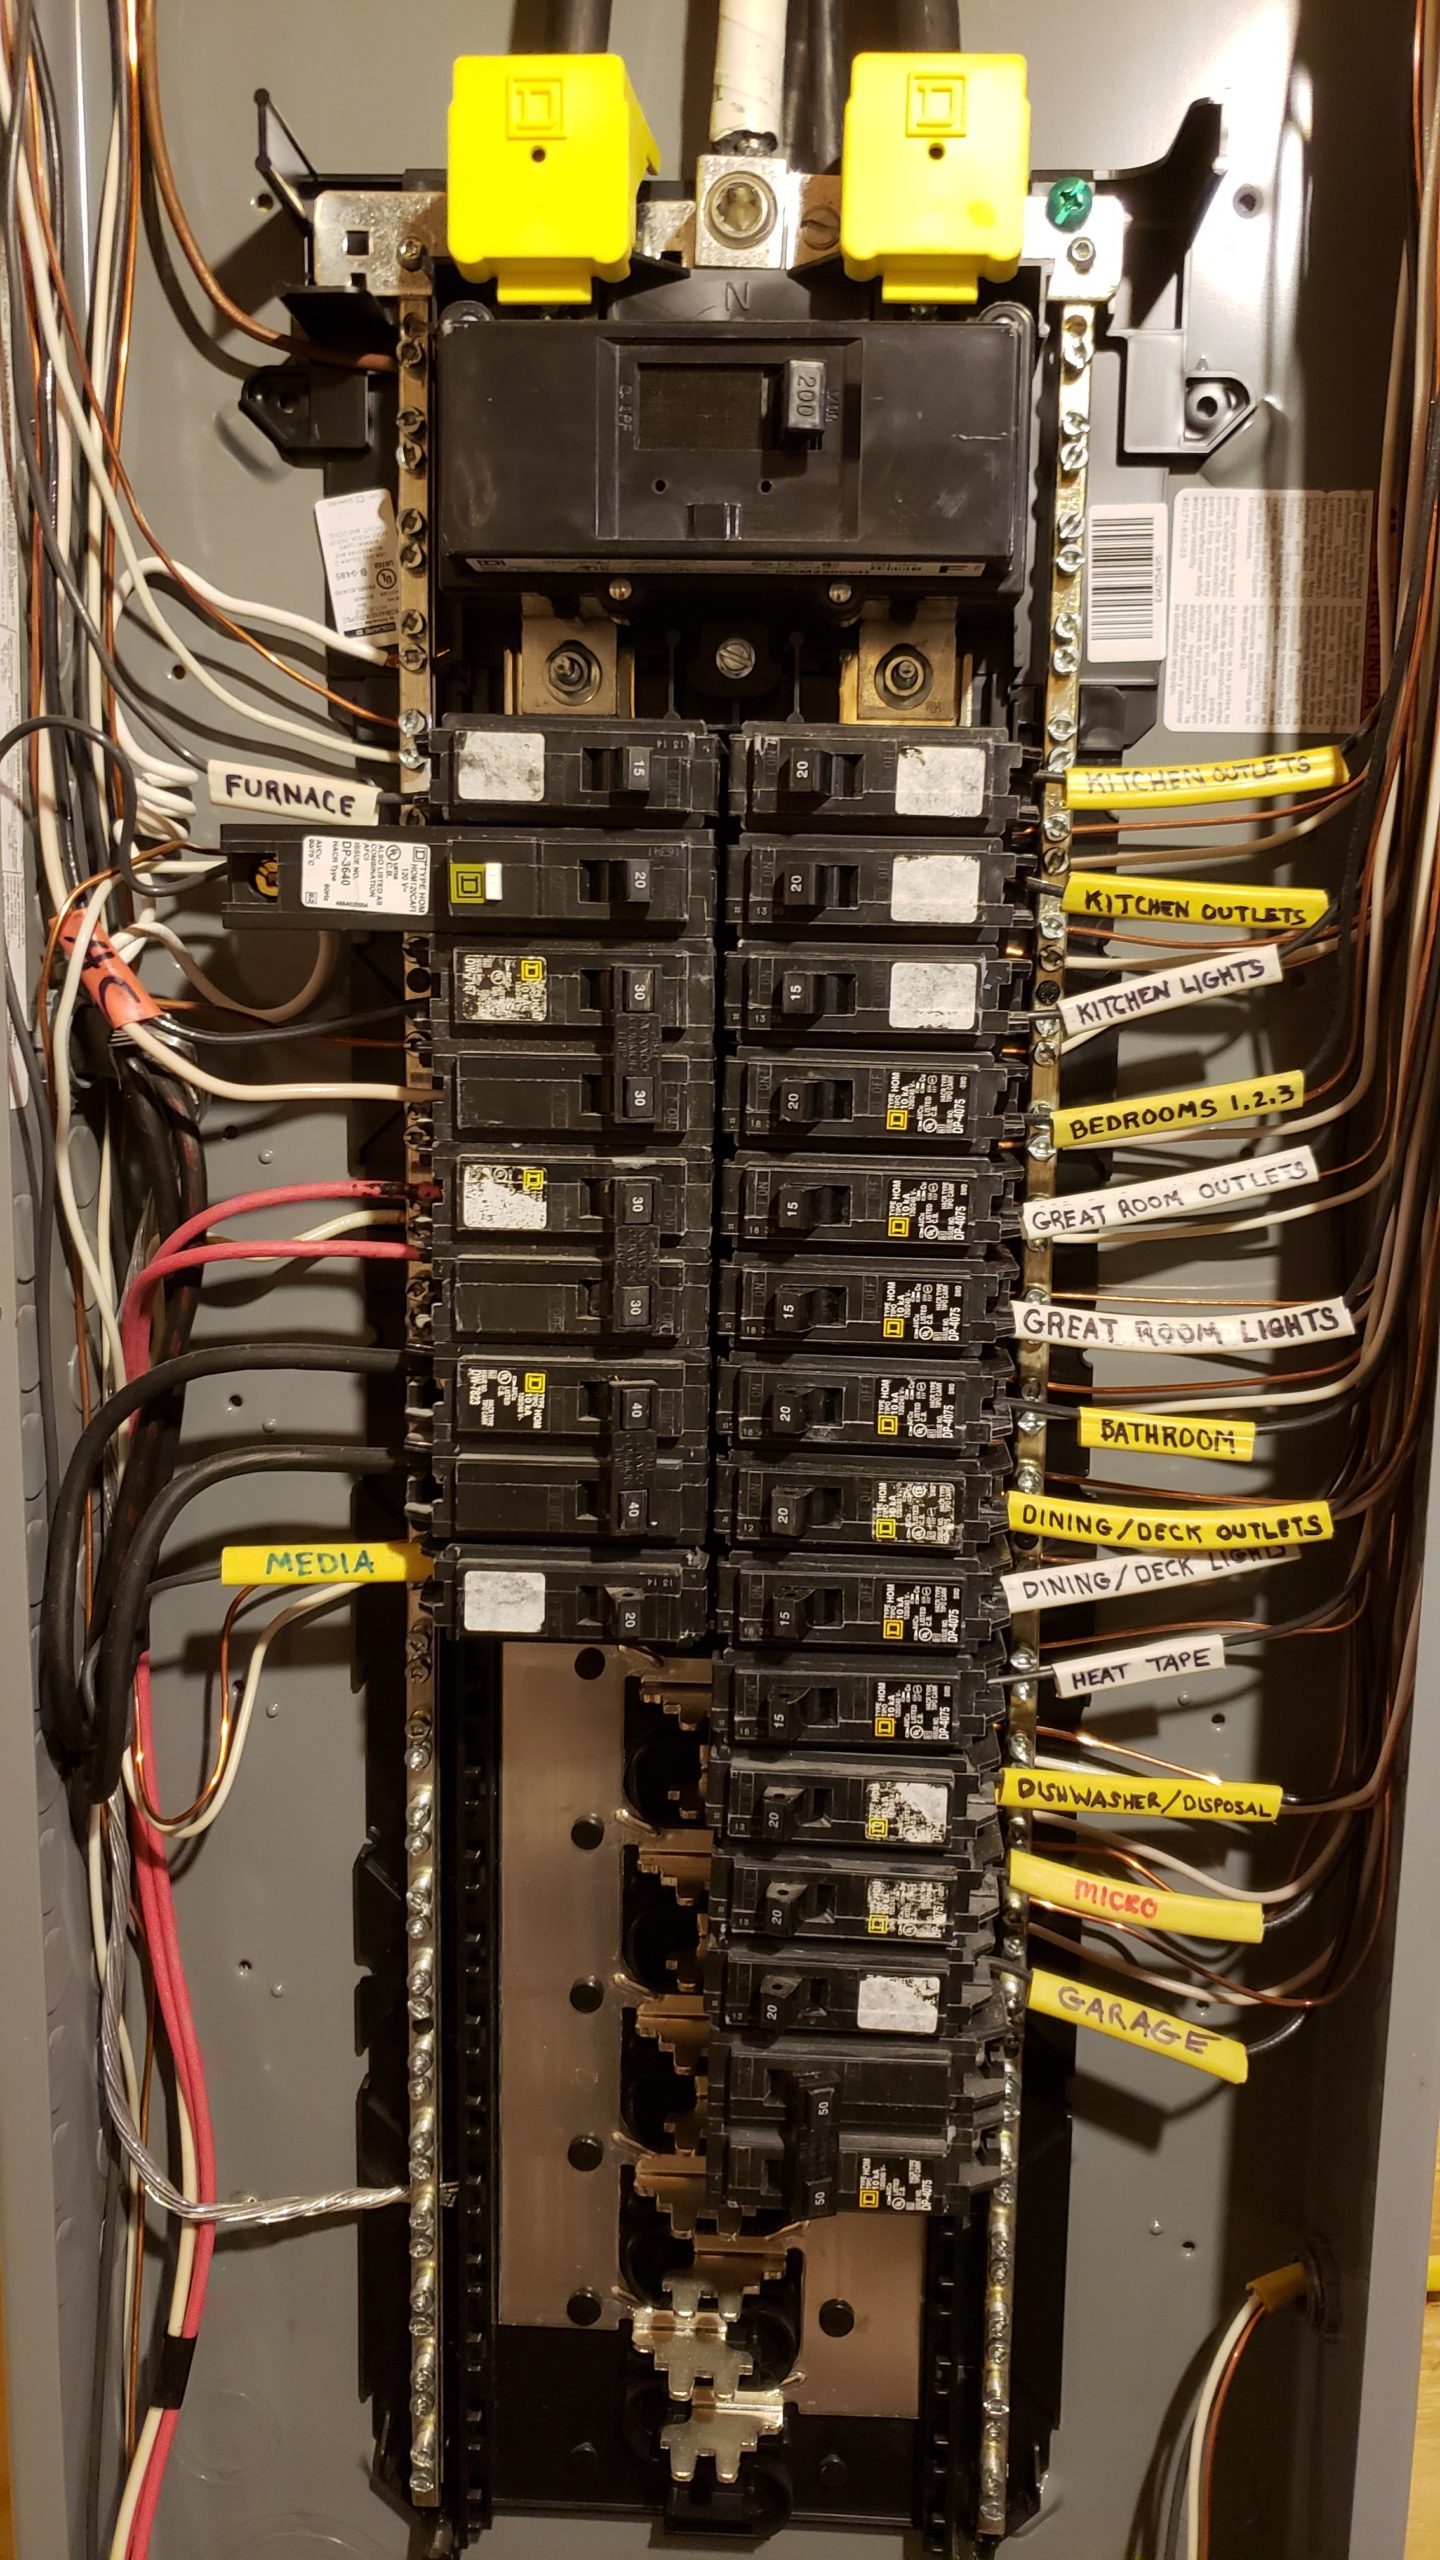
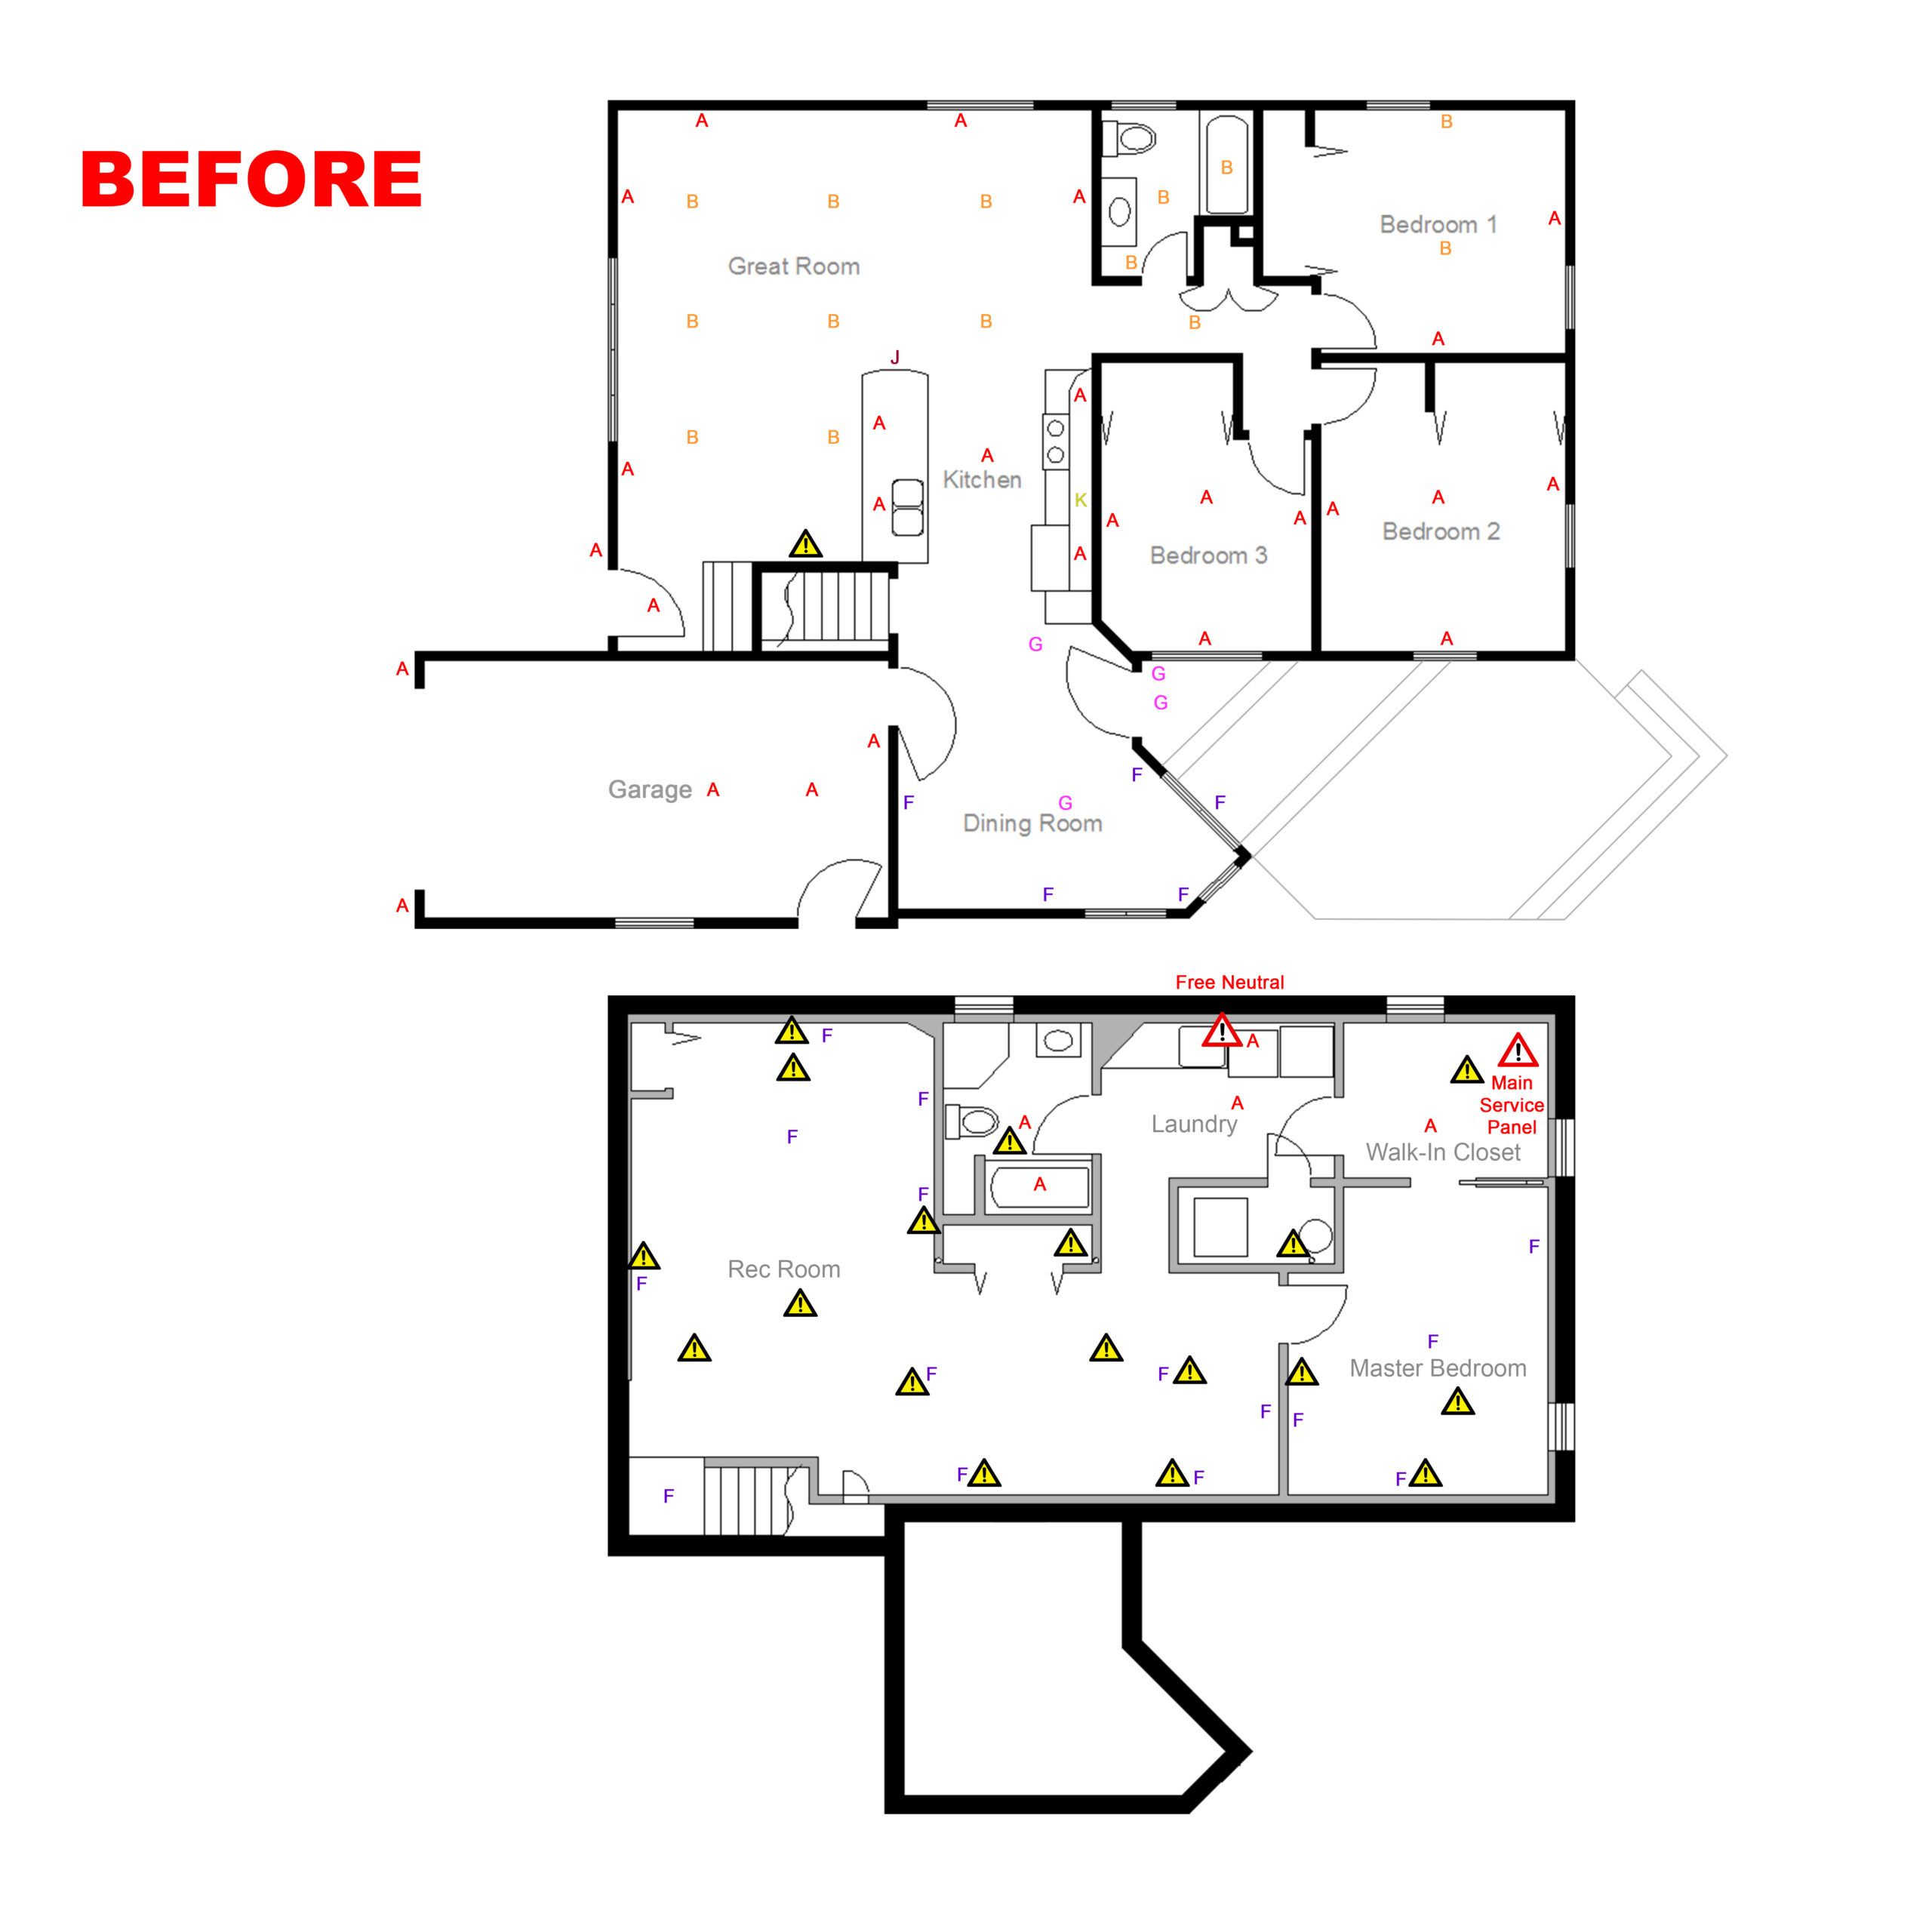
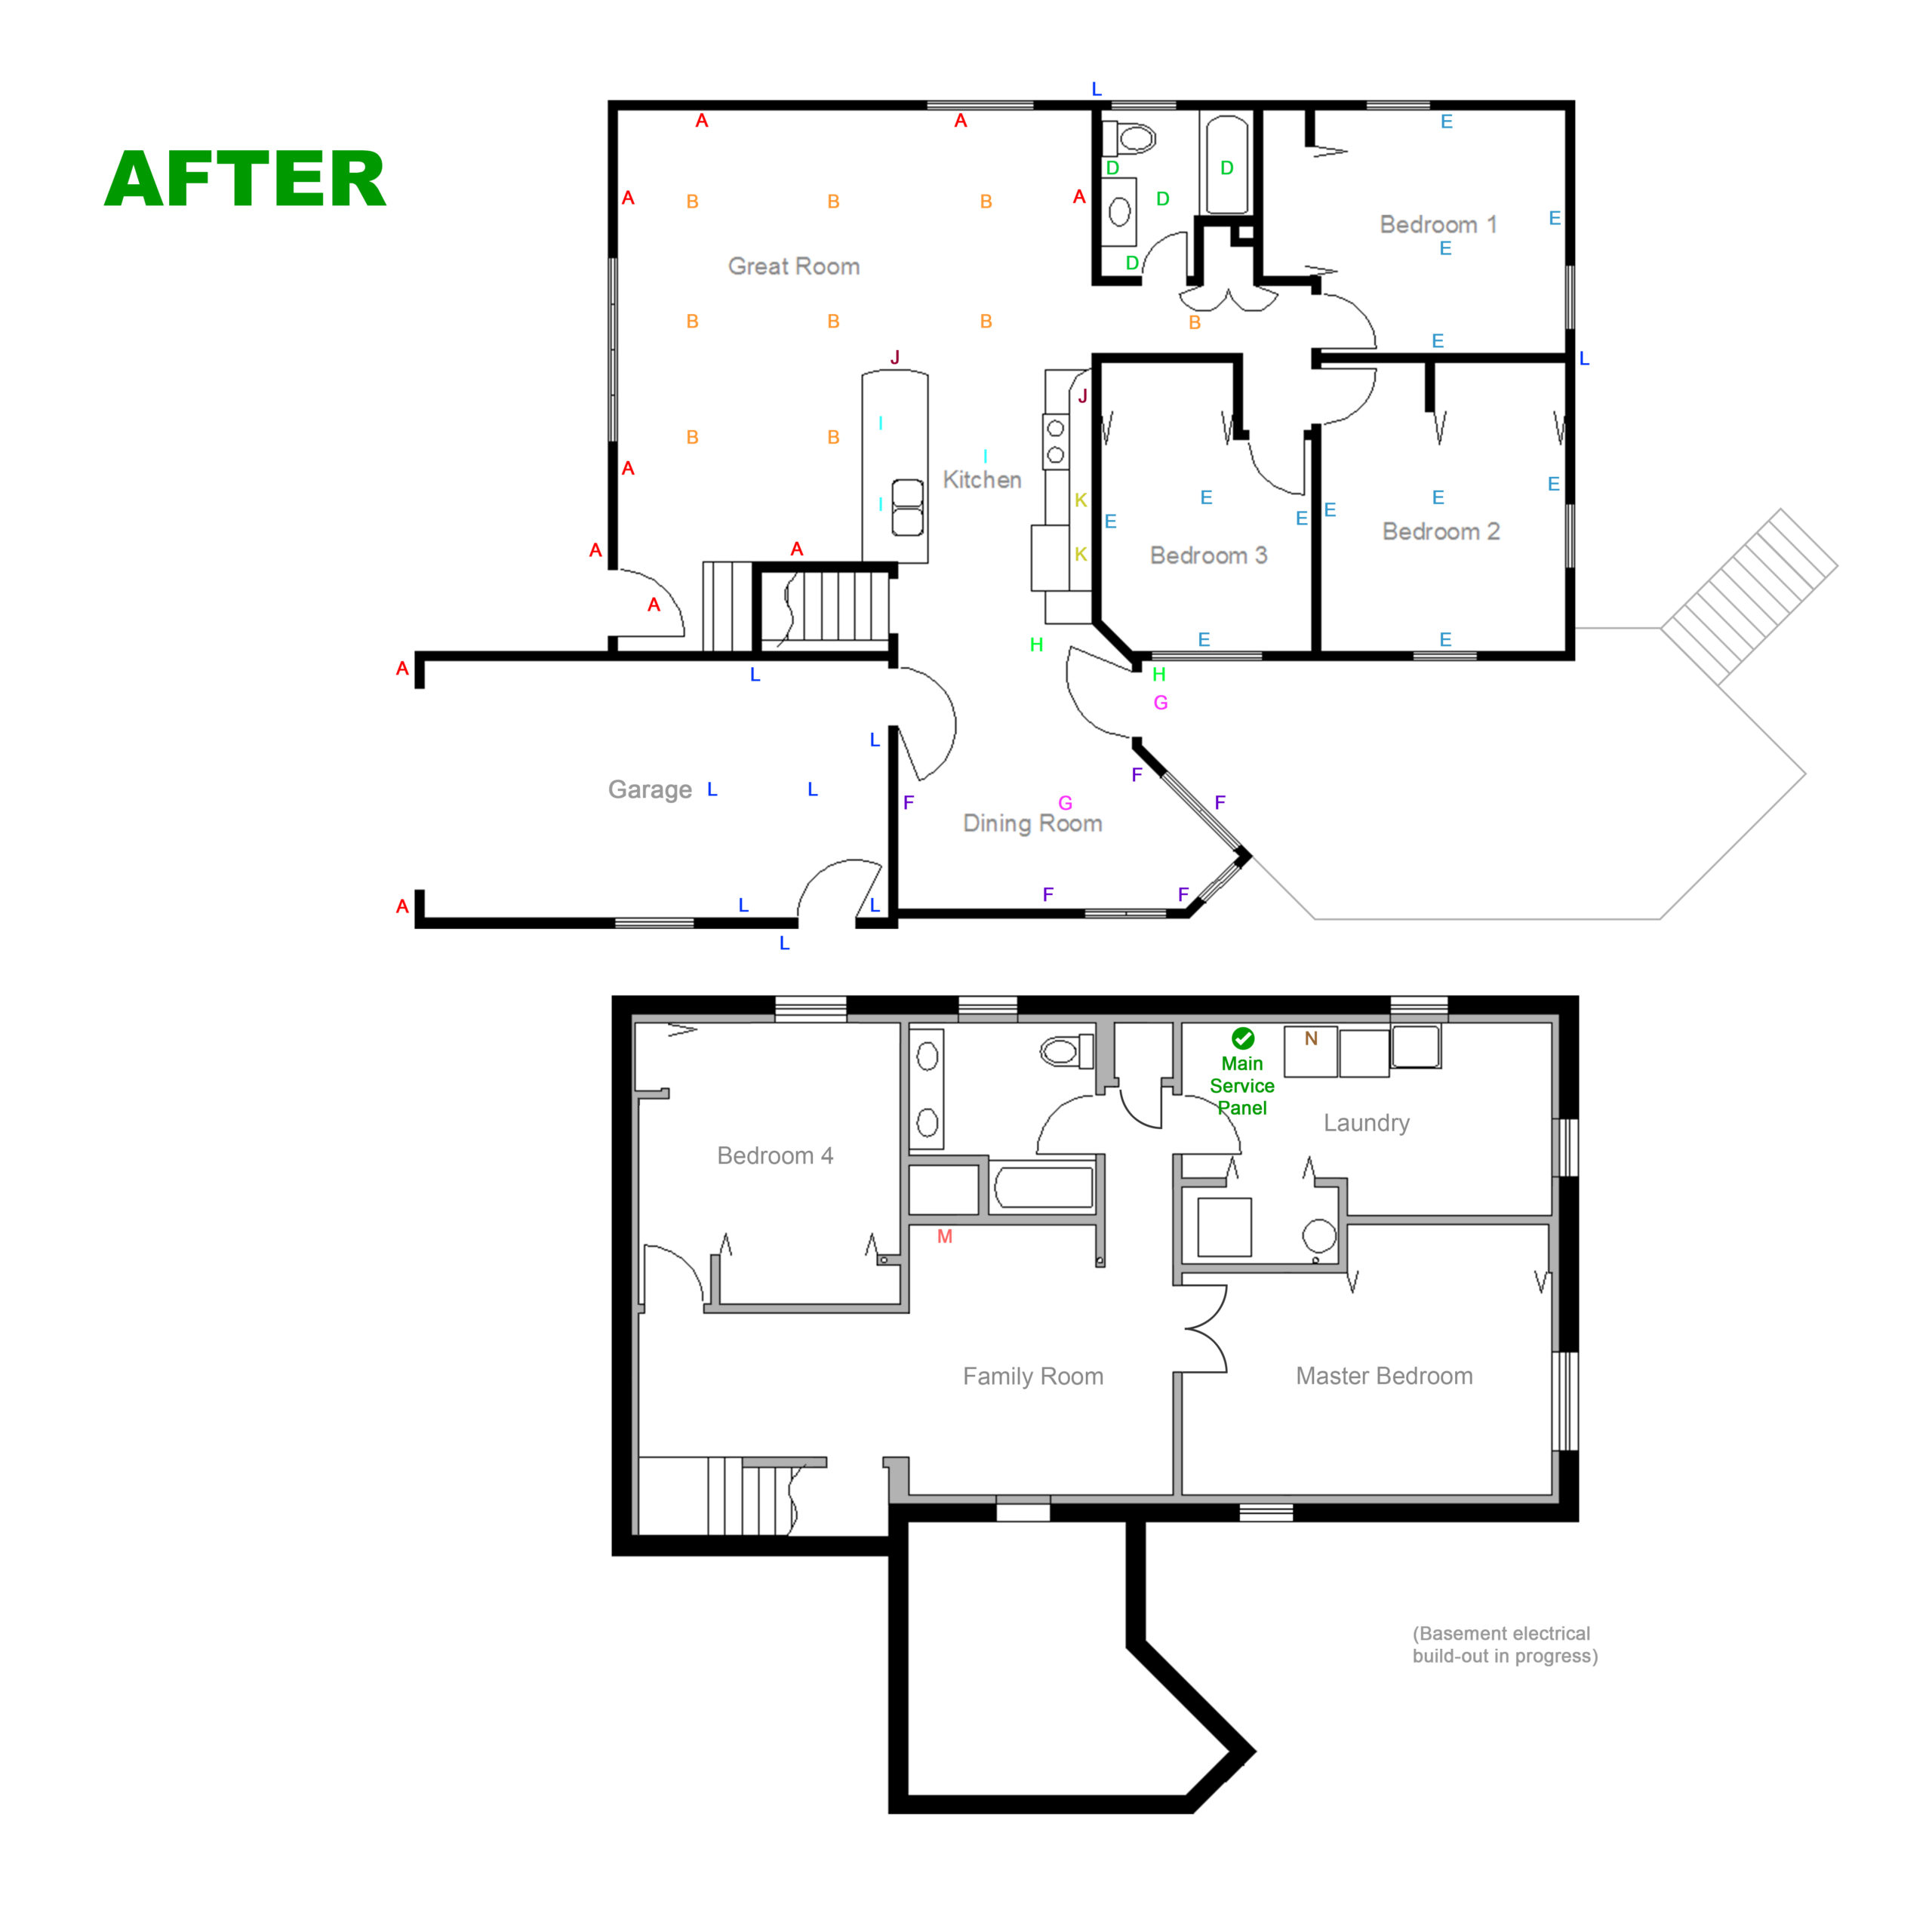
I have completed all of the electrical repairs in the entire house. This is first time everything has worked properly in 5 years. I mapped every circuit in the house, re-wired them to eliminate unnecessary junction boxes, repaired faulty circuits, and re-balanced the load to each breaker. I even managed to do it by re-using 75% of the old wire, wire nuts, wire staples, and so on. Better yet, I was able to fish new wires from either the basement level or the attic without demolishing any of the finished walls on the main level. Now, the lights are steady, even when the garage door opens, the refrigerator pump kicks in, or the laundry machine changes cycles. The lights even seem to turn on just a bit faster. With these repairs completed, I’ll feel a whole lot better about covering up the walls knowing that all of the wiring behind them is properly balanced, 100% to code, and organized logically.
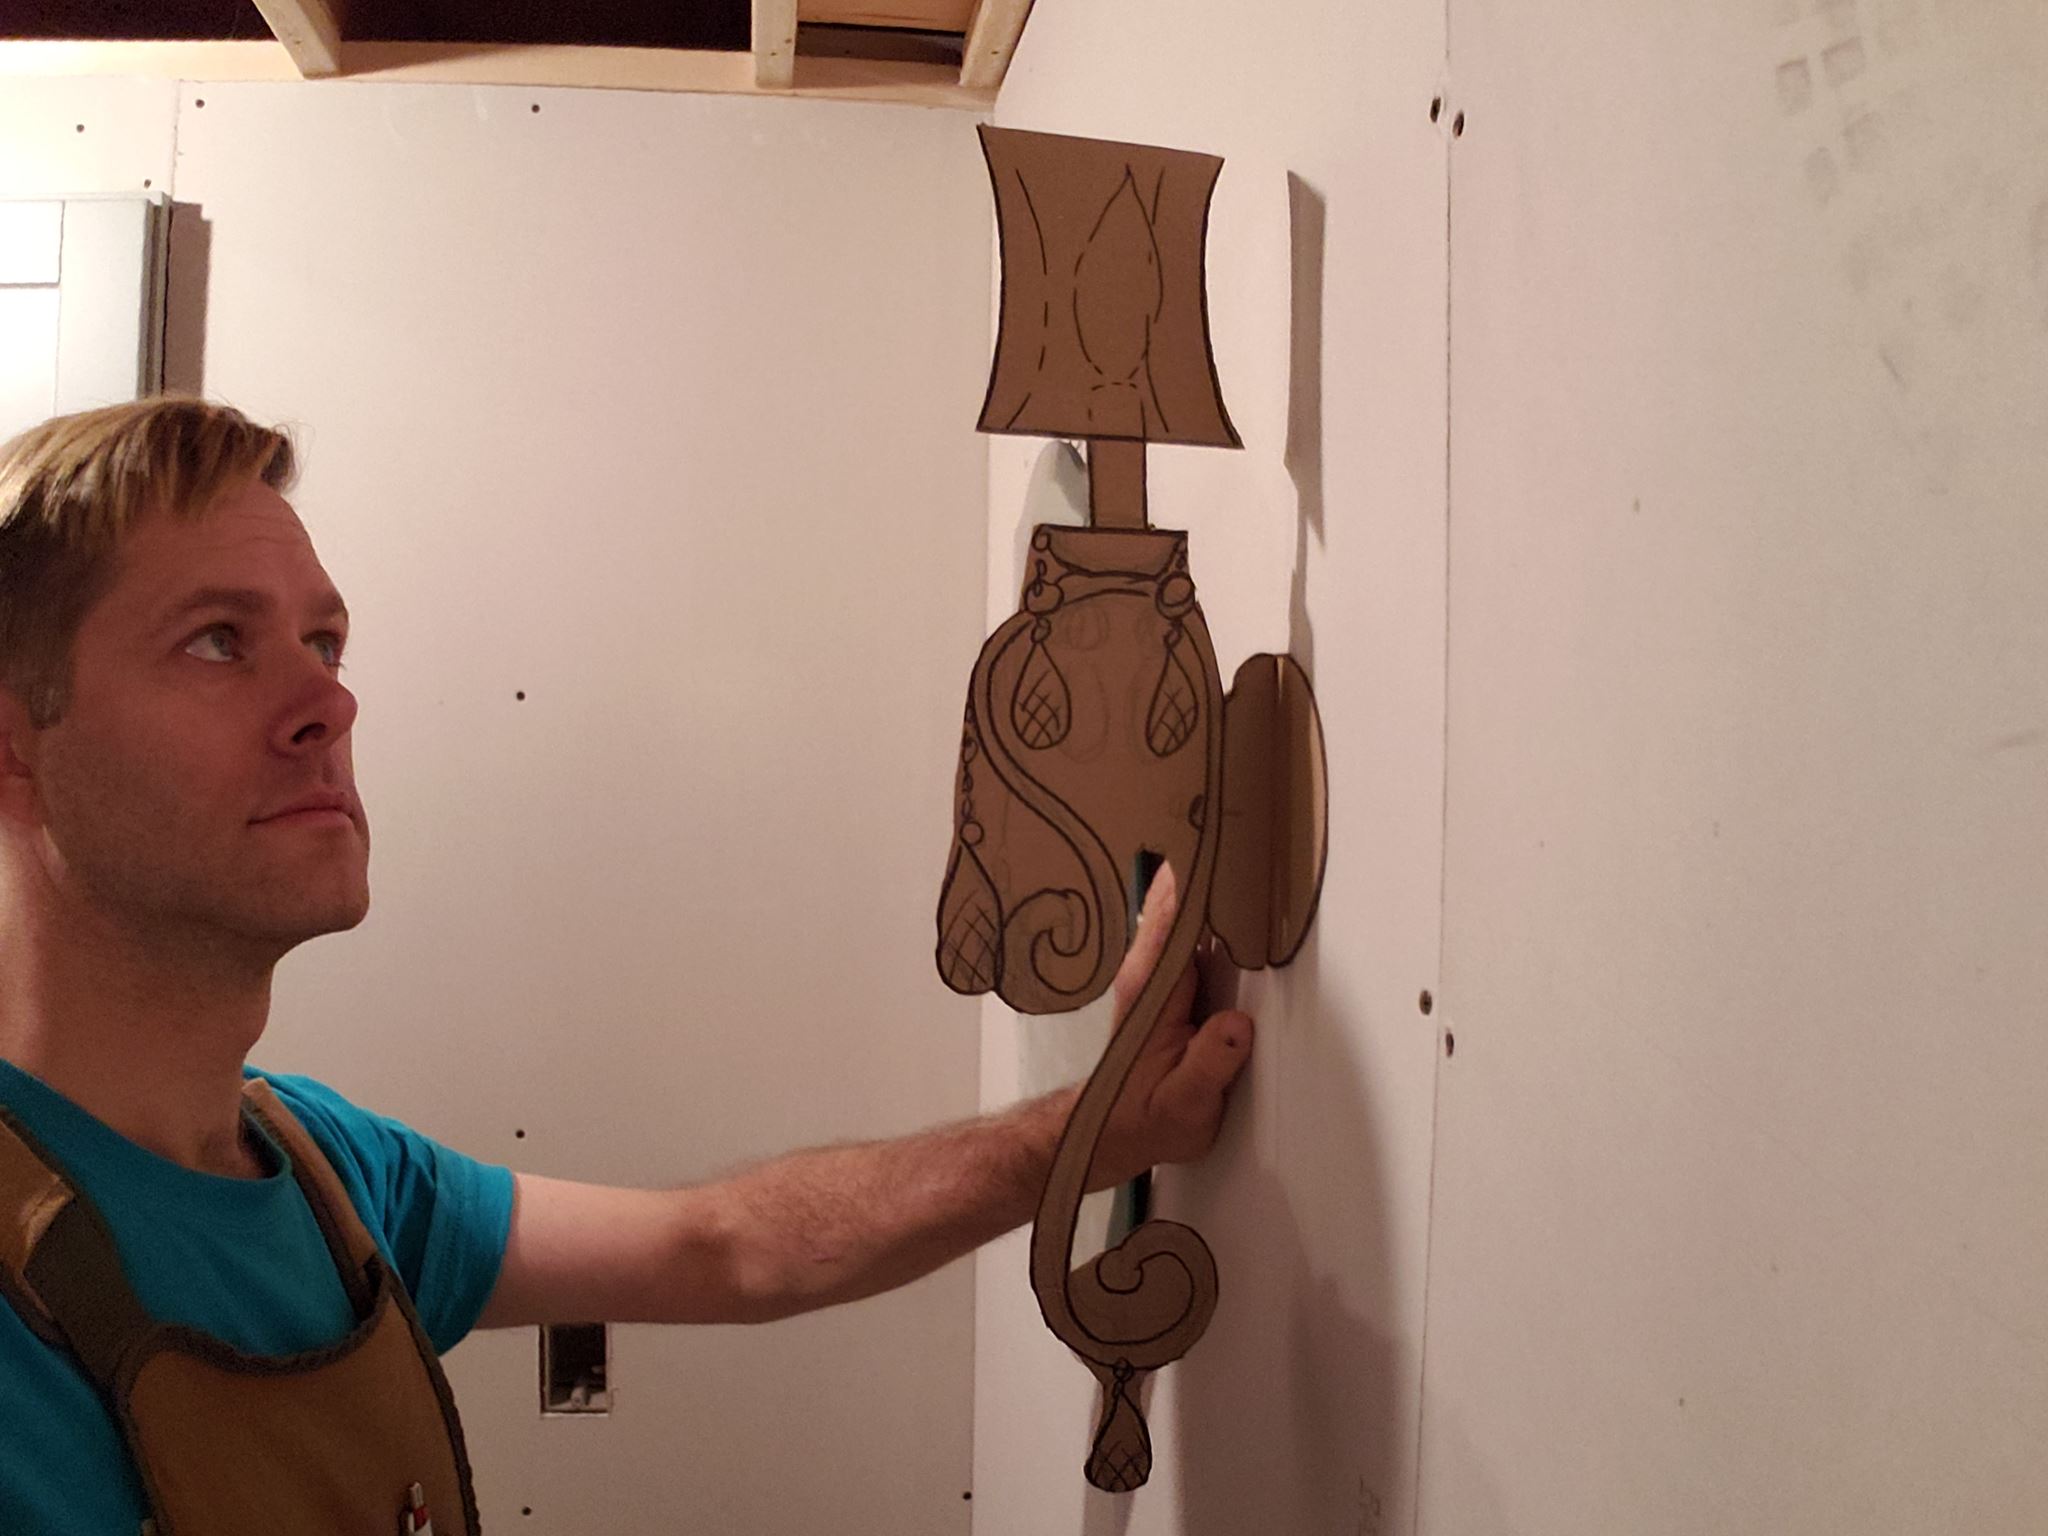
Electrical rough-in inspection is on Friday, but the bathroom sconces won’t arrive until Saturday, so I made a full-size cardboard mockup. We’ll use this to position the junction boxes in the wall, and wire them up on time.
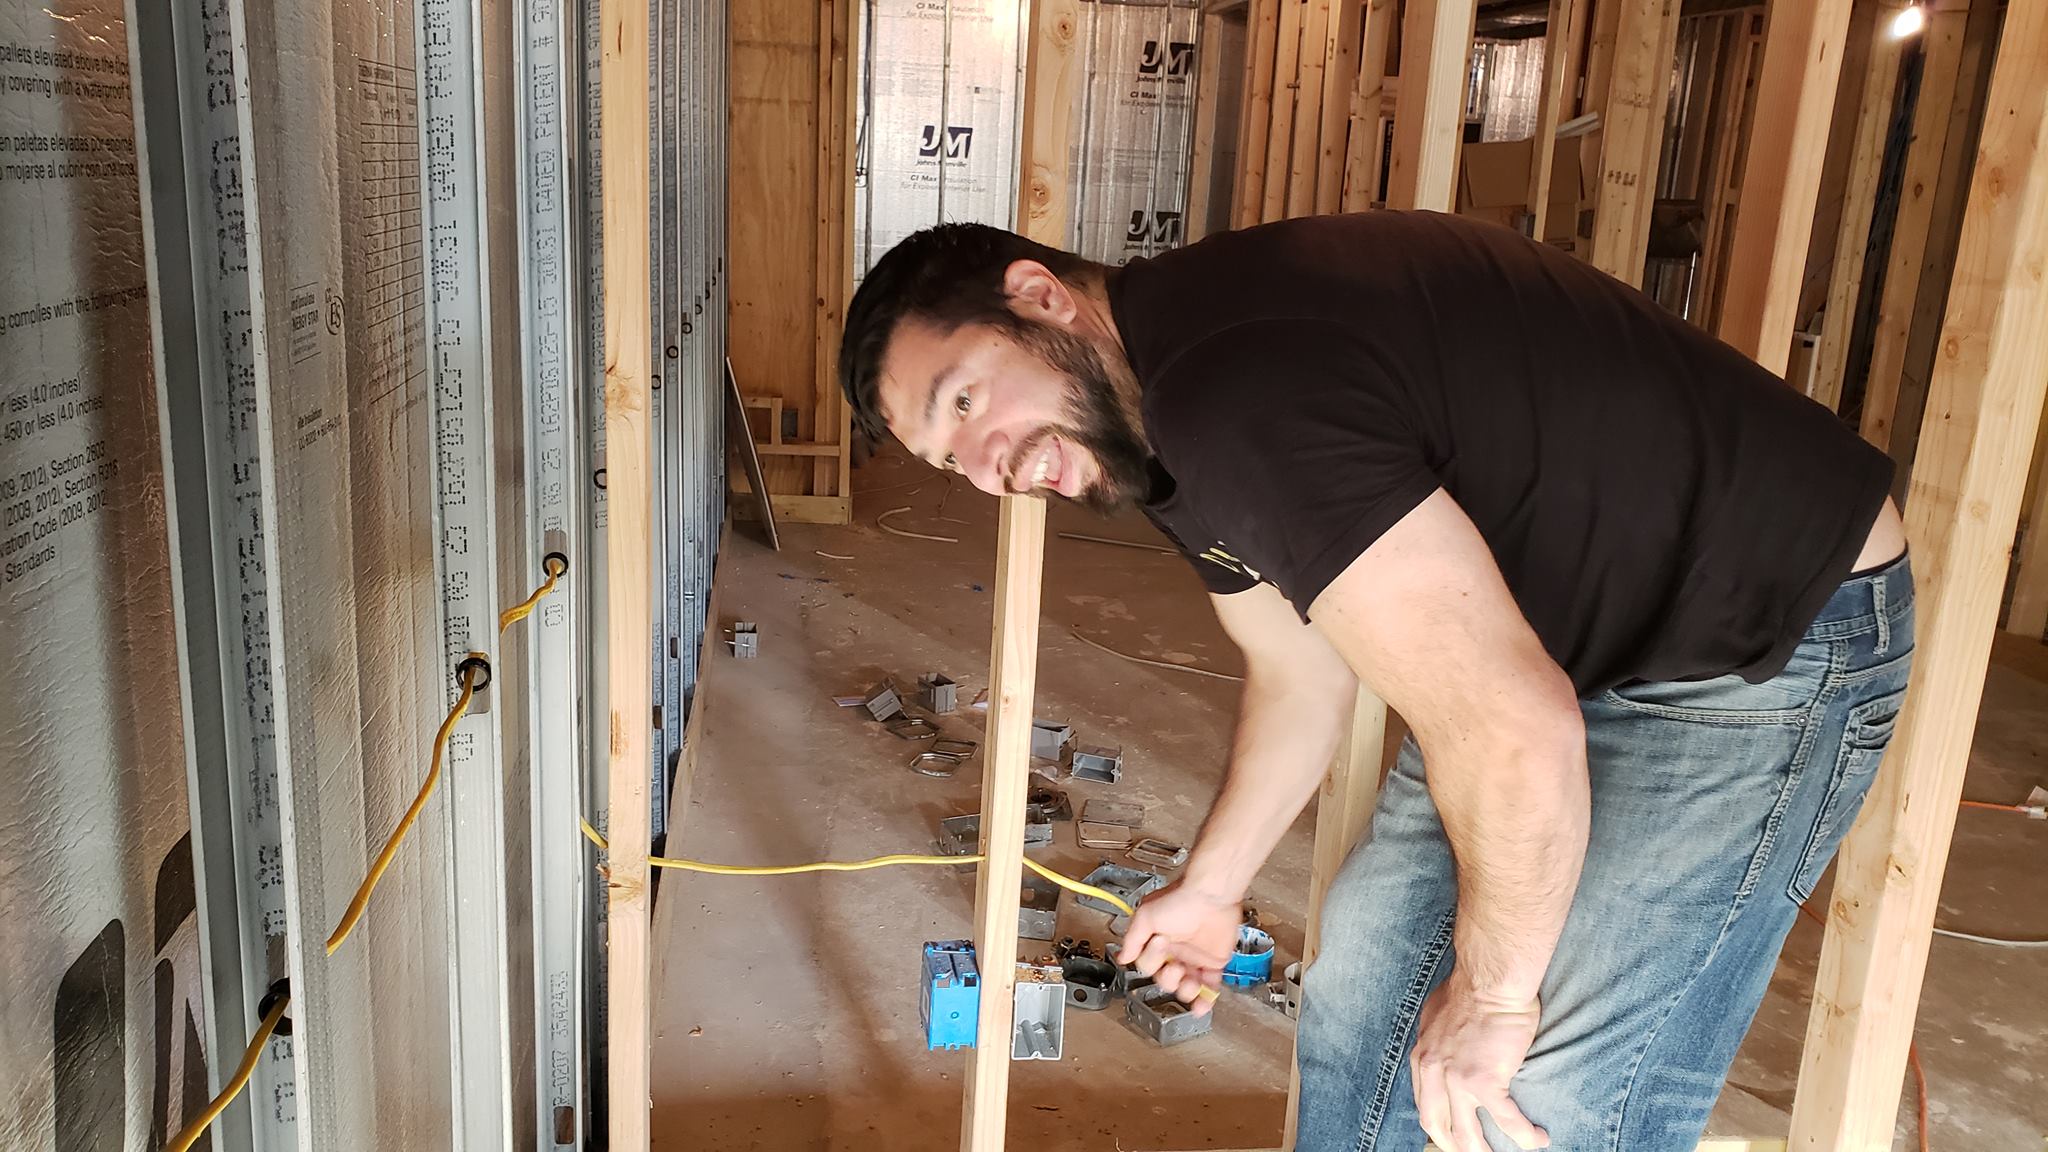
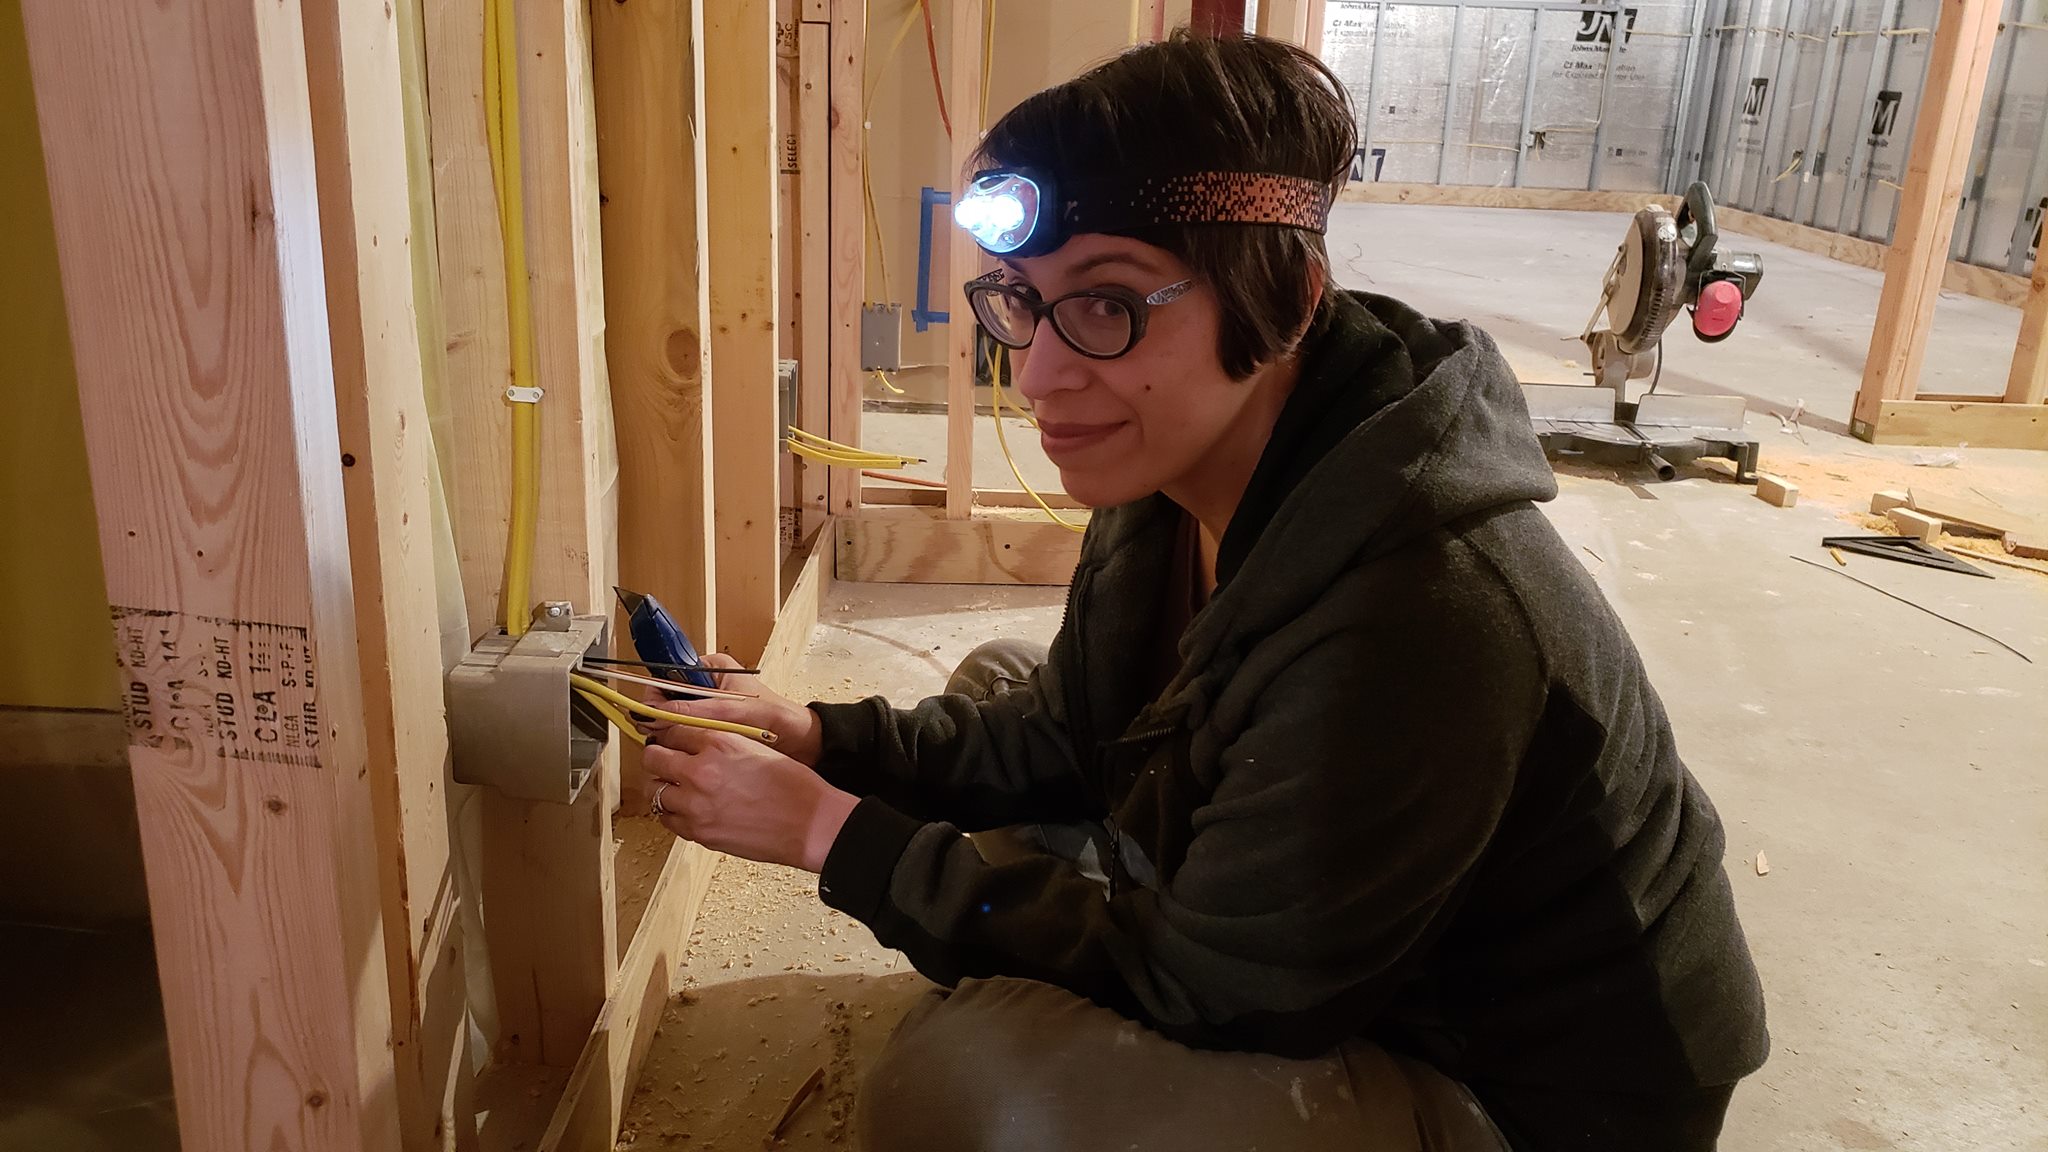
My brother-in-law, Apollo, spent Thanksgiving weekend helping us run wires for our electrical rough-in. Just look at that smile! Getting him a long-tail T-shirt for Christmas.
Today our electrical inspector used words like “wow”, “overkill”, and “excellent job”! With the rough-in complete, our next step is wiring the recessed lighting fixtures in the ceiling, adding a few light switches, and removing the temporary work lighting. Drywall starts in just 1 week!
My dad volunteers to help me run a new gas line for a future gas range in the kitchen. Bending a single soft copper pipe around corners and between floors without kinking it is harder than it looks!